

English
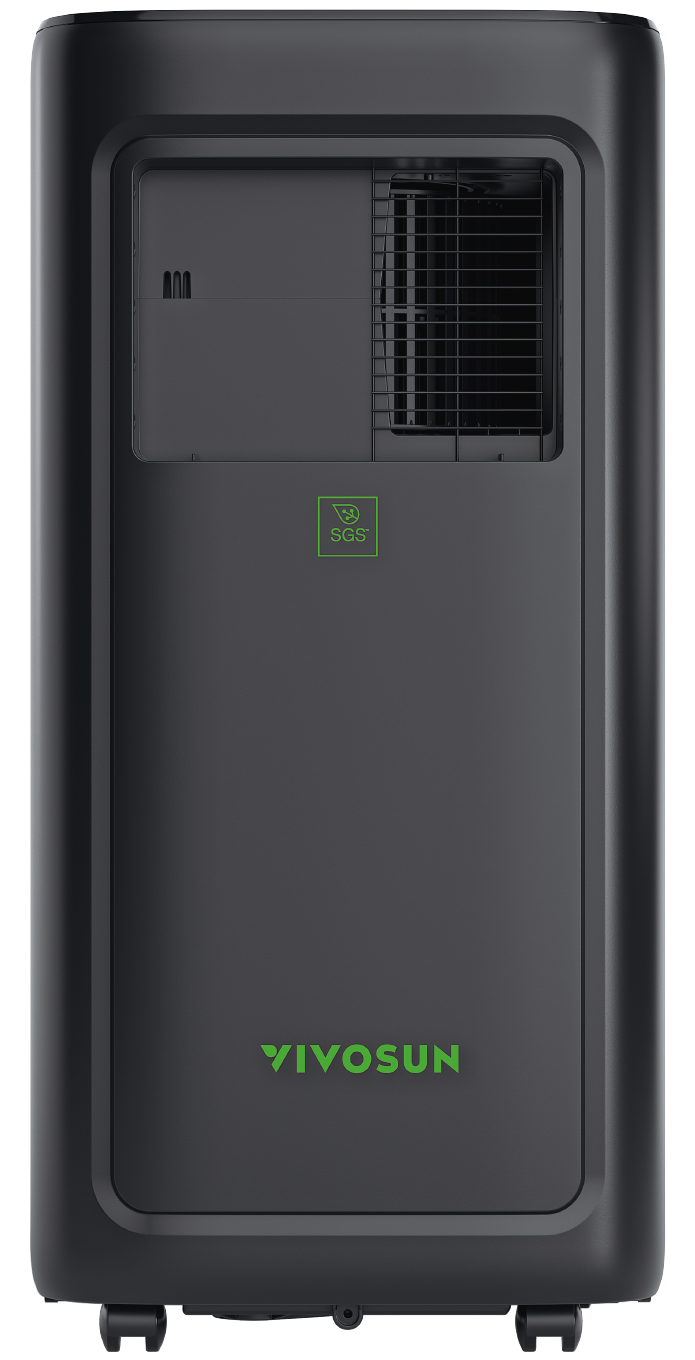
AeroLush C08 Manual
Safety Information
Please read these instructions carefully before using the device. Failure to follow these safety guidelines may result in injury, void the product warranty, and release Vivosun from all liability.
-
Do not operate the device with wet hands, submerge it in water, or place it near water or oil.
-
Do not pierce or burn the device.
-
Keep all ventilation openings clear of obstructions.
-
Do not use this product outdoors, in direct sunlight, or expose it to weather or the elements.
-
Follow local grid interconnection rules when installing the air conditioner and ensure proper grounding. If you have any questions about electrical installation, follow the manufacturer’s instructions or consult a professional electrician.
-
Never insert fingers or objects into the air outlet. Warn children about these dangers.
-
If the device emits a burning smell or shows signs of malfunction, immediately cut off the power supply and stop using it.
-
Do not disassemble, modify, repair, or clean internal components without authorization.
-
Keep hands away from the air outlet and internal components.
-
Do not place heavy objects on the air outlet or sit directly on it.
-
Do not replace the power cord without authorization, splice it, or use it in parallel with other high-power electrical devices.
-
Do not cover the product or power cords with rugs or other fabric materials.
-
Place the device on a flat, dry surface, maintaining at least 50 cm of clearance from surrounding objects or walls.
-
Do not place the product on a soft, elevated, or unstable surface where it may fall or have its air intakes or exhaust blocked.
-
Do not clean the air conditioner with chemical solvents such as gasoline or alcohol. Before cleaning, disconnect the power supply and use a slightly damp soft cloth. For heavy dirt, use a mild detergent.
-
This device may be used by children aged 8 and above, as well as individuals with reduced physical, sensory, or mental capabilities, or those lacking experience and knowledge, provided they have received proper supervision or instruction on its safe use and understand the associated hazards. Children must not play with the device.
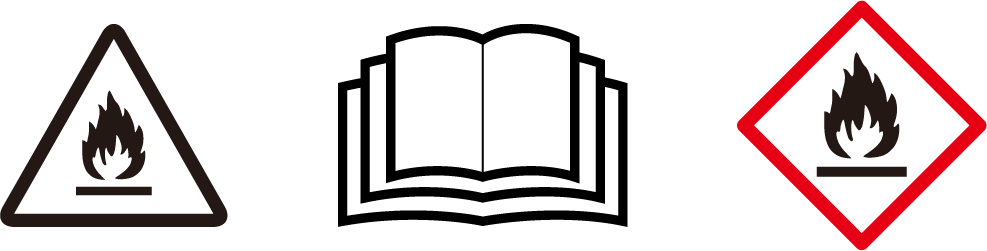
Risk of fire or explosion—this device contains a flammable refrigerant. Follow all additional safety precautions to prevent hazards.
-
Do not use any methods to accelerate the defrosting process or for cleaning other than those recommended by the manufacturer.
-
The device must be stored in a room without continuously operating ignition sources, such as open flames, gas appliances, or electric heaters.
-
Do not pierce or burn refrigerant tubing. Be aware that refrigerants may be odorless. Keep ventilation openings clear of obstruction.
-
Do not drill holes in the unit.
-
Maintenance, cleaning, and servicing should only be performed by technicians who are properly trained and qualified in handling flammable refrigerants.
-
Dispose of the air conditioner in accordance with federal and local regulations. Flammable refrigerants require special disposal procedures.
Key Features
|
Designed for Growing Effortless installation—quickly connect the air conditioner to your grow space. |
|
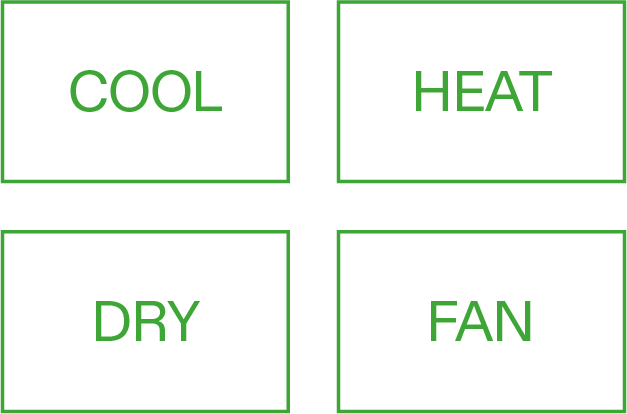
4-in-1 Mode 4-in-1 Mode: Cool, Heat, Dry, Fan. Create the ideal environment for your grow space. |
|
Precise Sensor External temperature and humidity probes can be connected for precise, targeted environmental readings. |
|
Convenient Operation Connect to the Vivosun app for remote control of the device, in addition to using the local operation panel. |
Product Contents
| Image | Name | Quantity |
|---|---|---|
|
|
C08 |
1 PC |

|
Evaporator Air Inlet Hood |
1 PC |
|
Evaporator Air Outlet Hood |
1 PC |
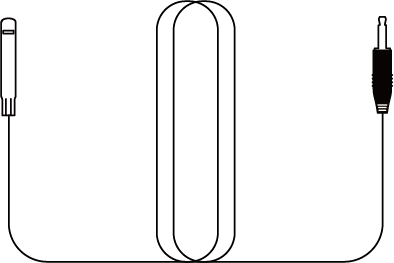
|
Temperature and Humidity Probe |
1 PC |
|
Exhaust Duct 2m(with adapter) |
2 PCS |

|
Exhaust Duct 2m |
1 PC |
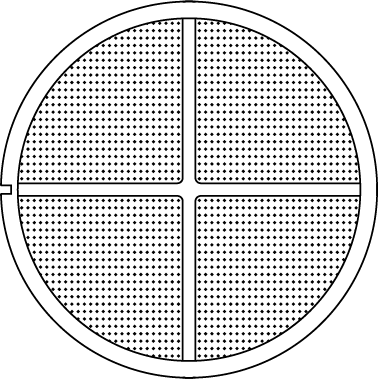
|
Filter |
1 PC |
|
Condenser Outlet Adapter |
1 PC |
|
Window Duct Adapter |
1 PC |
|
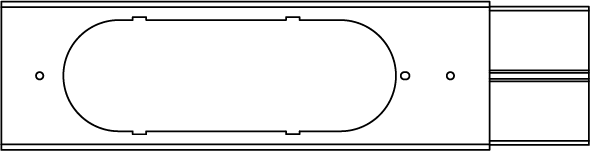
Window Sealing Plate Assembly (Long) |
1 PC |
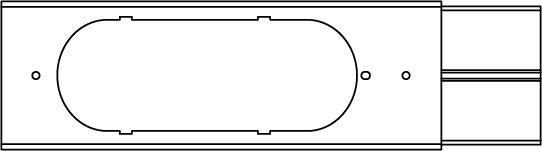
|
Window Sealing Plate Assembly (Short) |
1 PC |

|
Drain Pipe |
1 PC |
Dimensions
Size |
13.0*12.9*27.2 inch(33*32*69cm) |
Net Weight |
44.9 lbs (20.4kg) |
Power Supply |
115-120 V AC 60 Hz/220-240V AC 50Hz (For Available Voltage,please refer to product label) |
Dehumidifying Capacity |
90 Pints/Day (95°F, 90% RH) 43 L/Day (35 °C, 90% RH) 80 Pints/Day (86°F, 80% RH) 38 L/Day (30 °C,80% RH) 45 Pints/Day (80°F, 60% RH) 21 L/Day (27 °C, 60% RH) 25 Pints/Day (65°F, 60% RH) 12 L/Day (18 °C, 60% RH) |
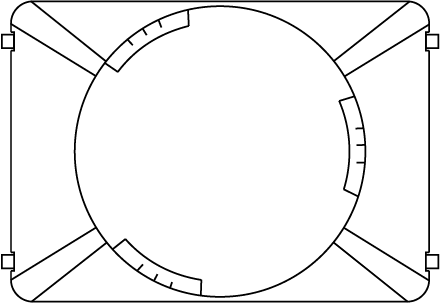
Installation
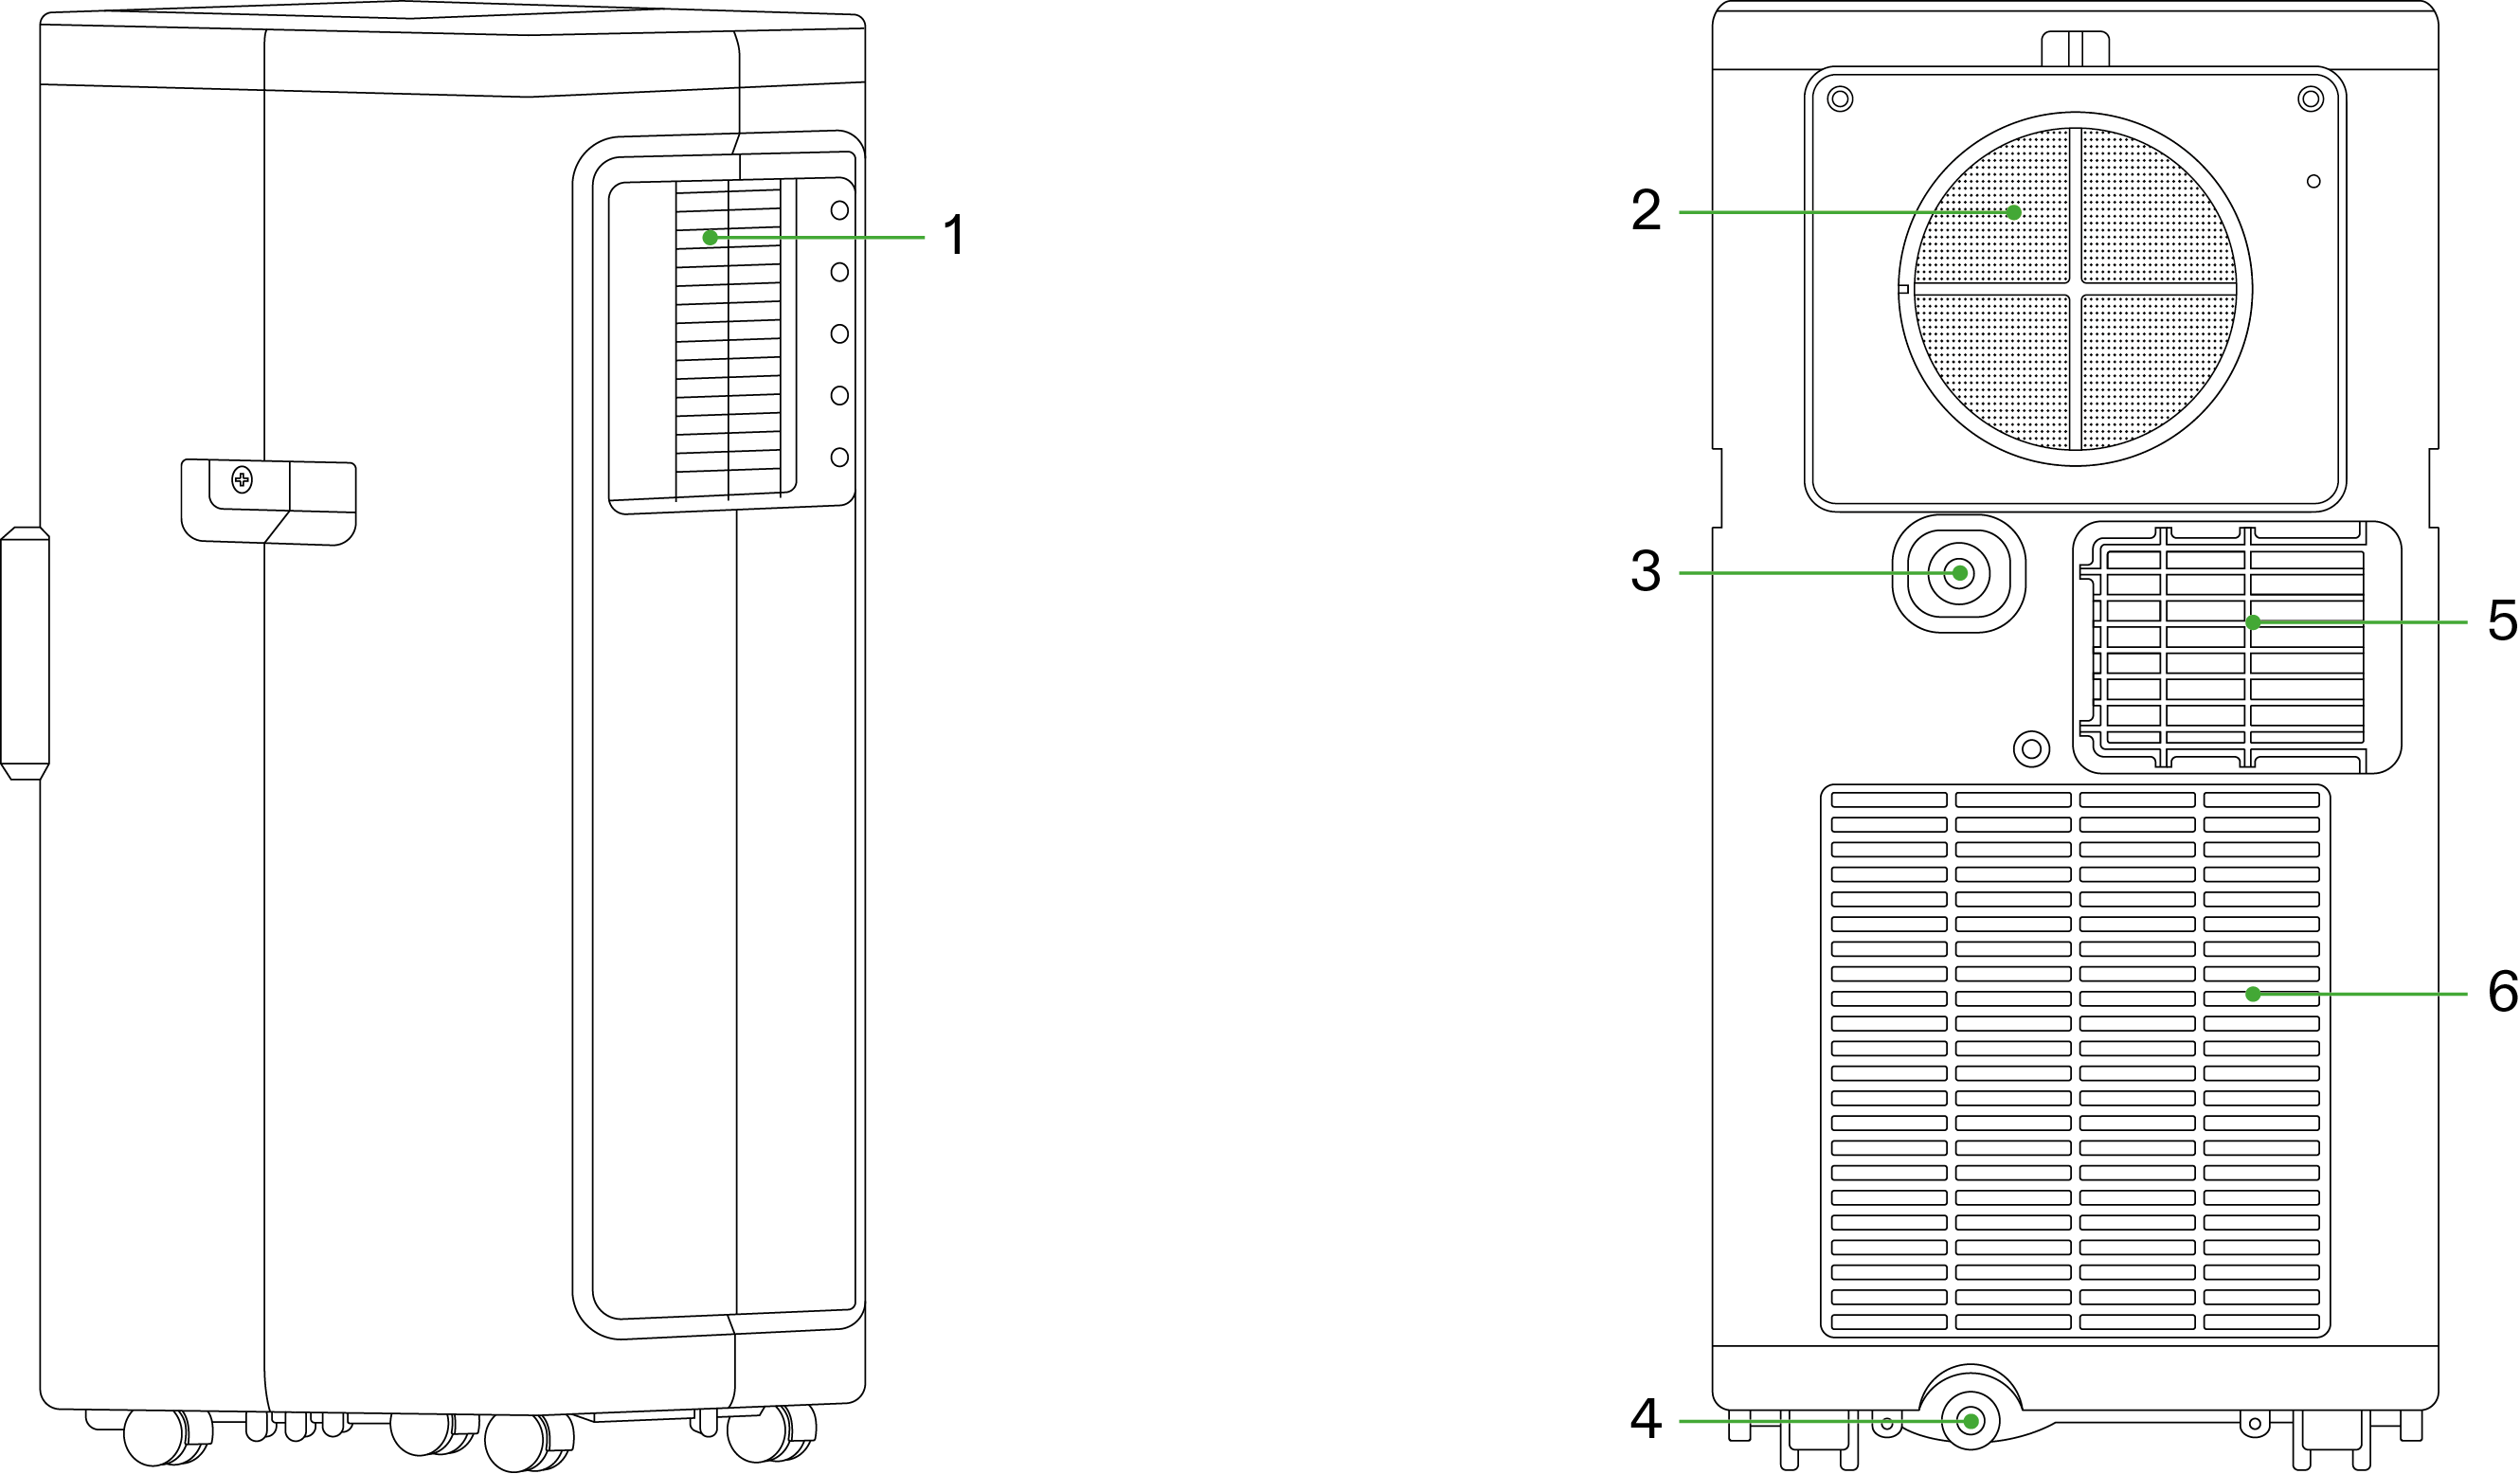
1 |
Evaporator Air Outlet |
4 |
Spare Drainage Hole |
2 |
Evaporator Air Inlet |
5 |
Condenser Air Outlet |
3 |
Drainage Hole |
6 |
Condenser Air Inlet |
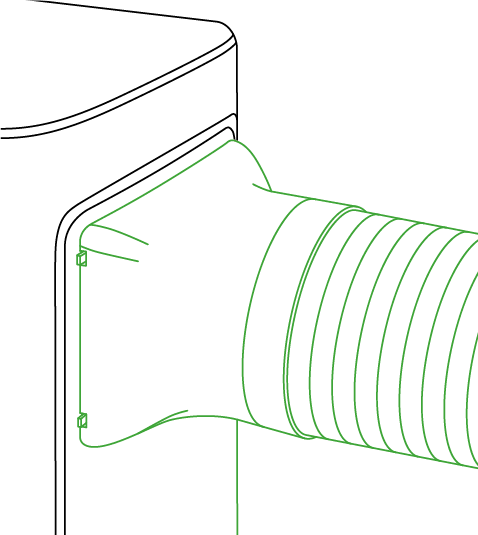
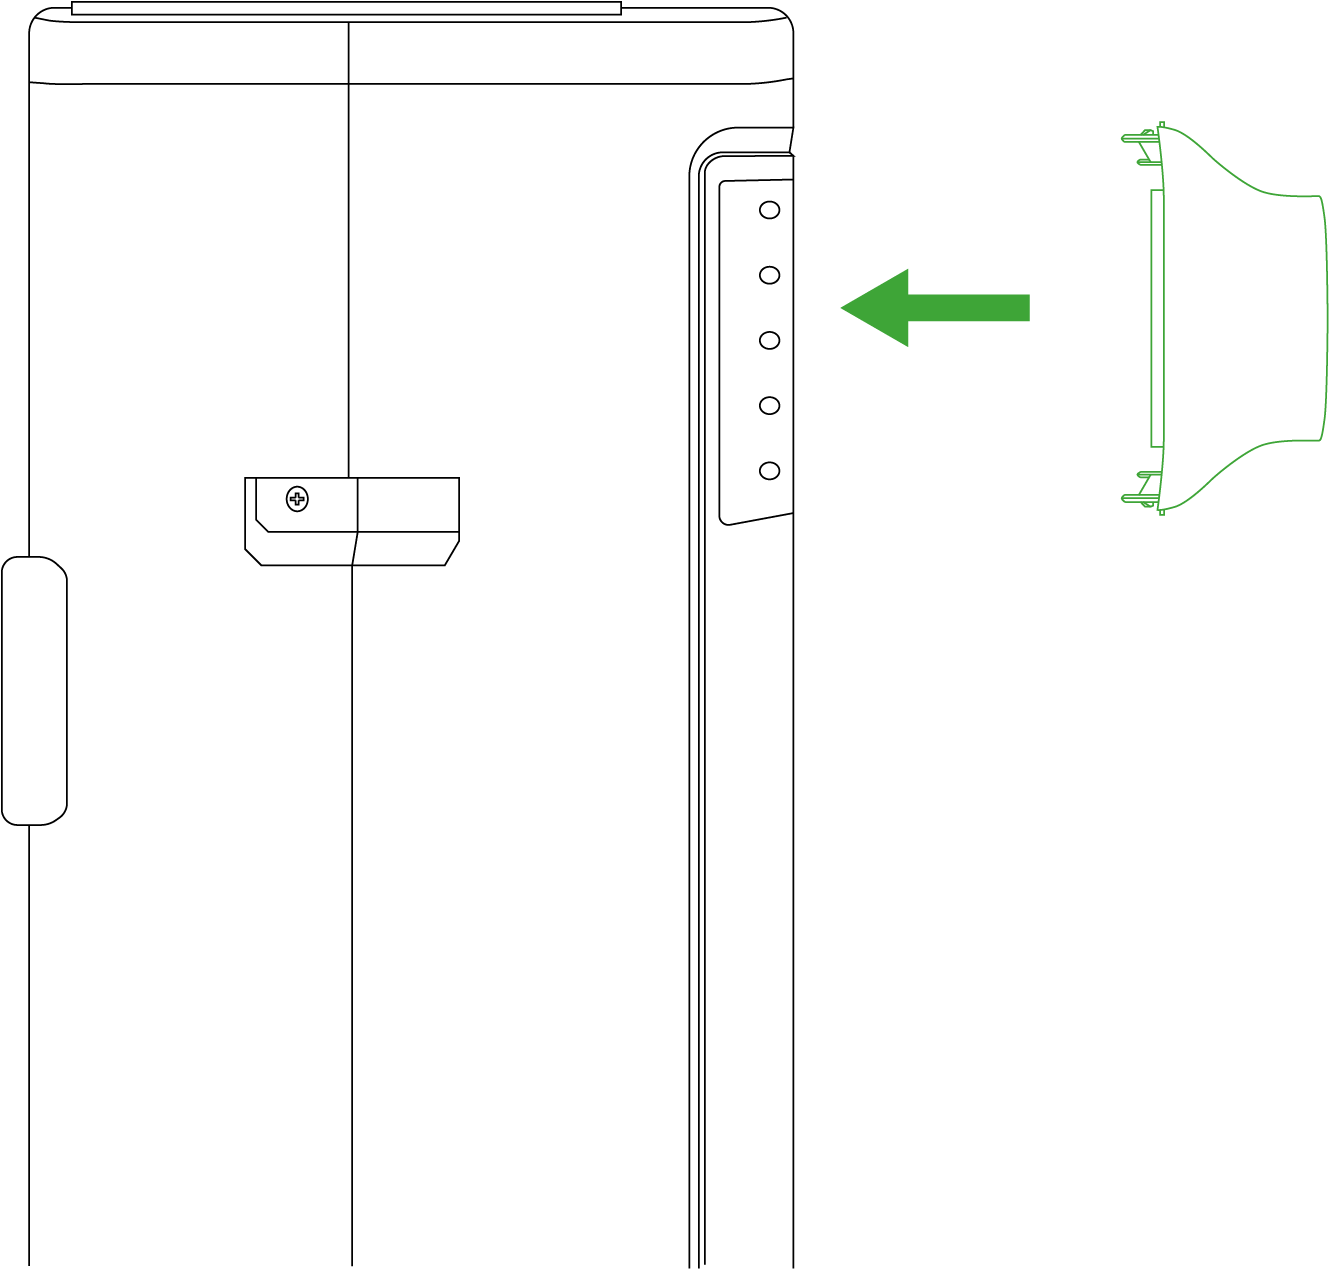
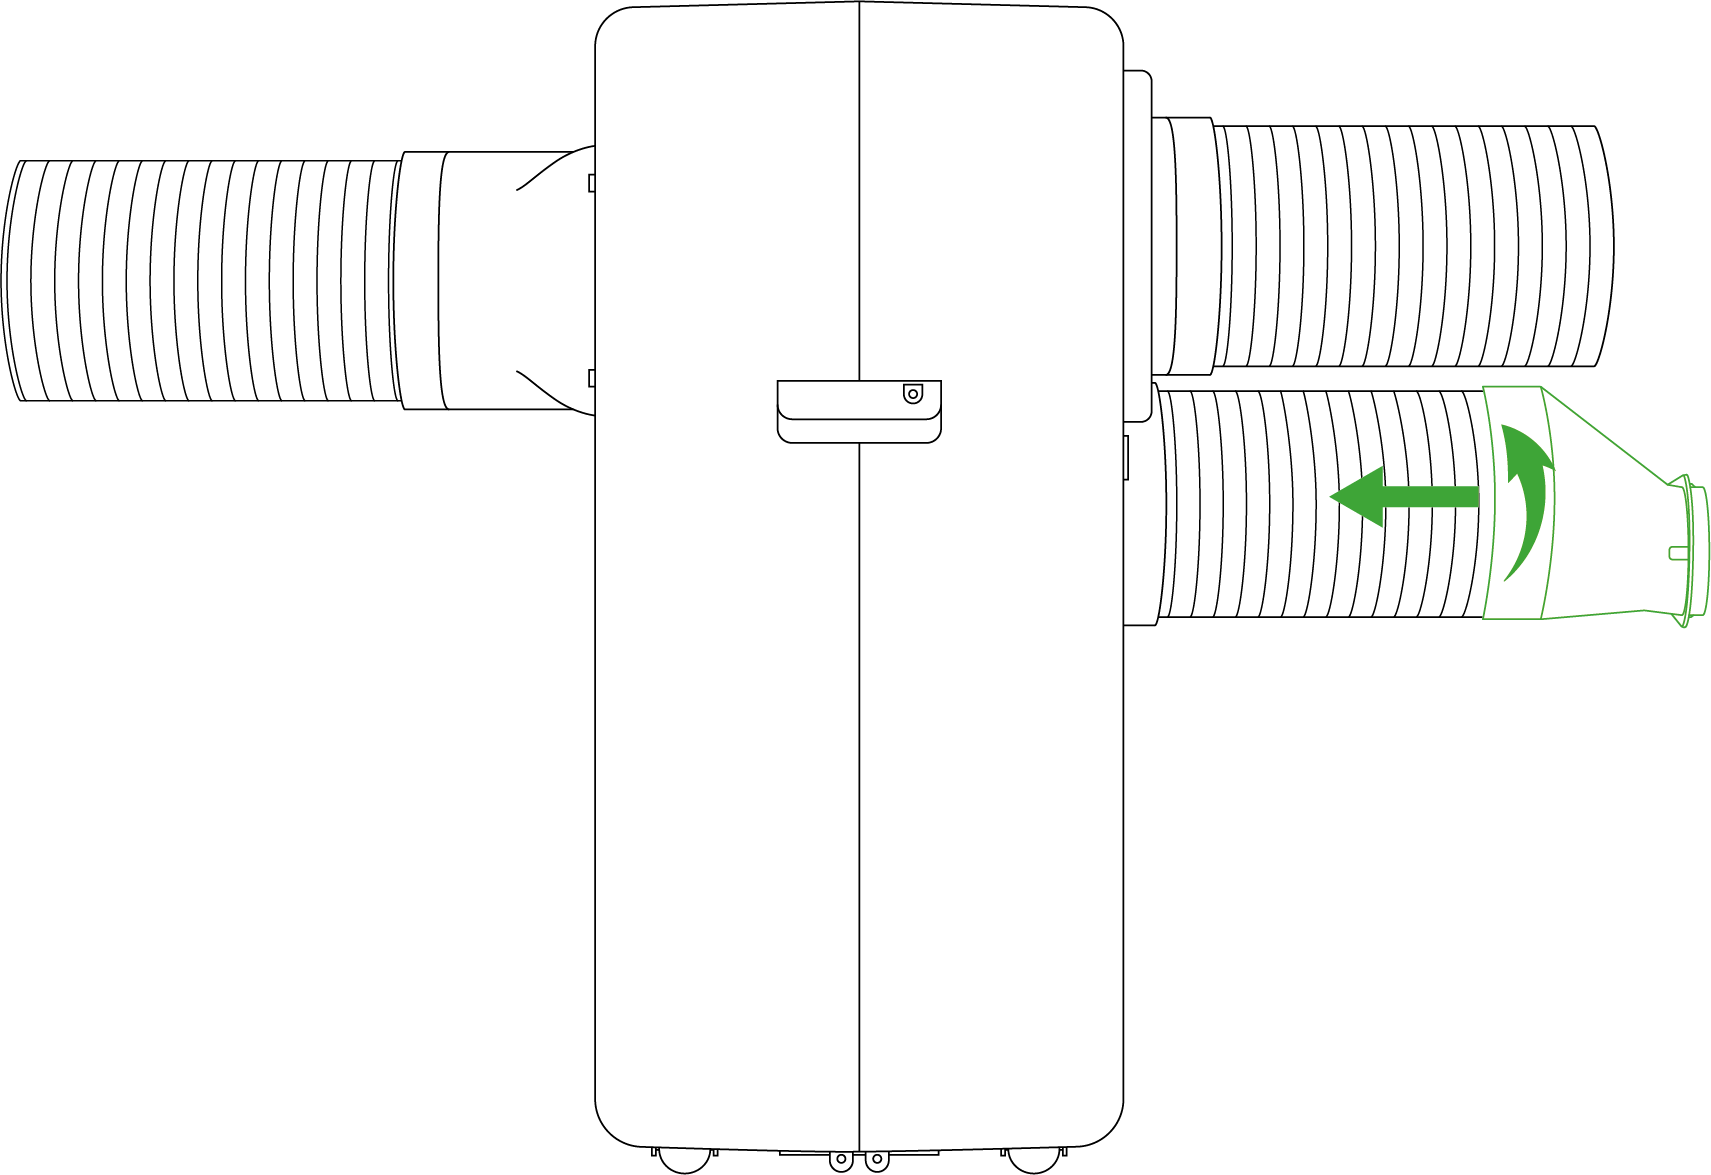
Installation of Accessories
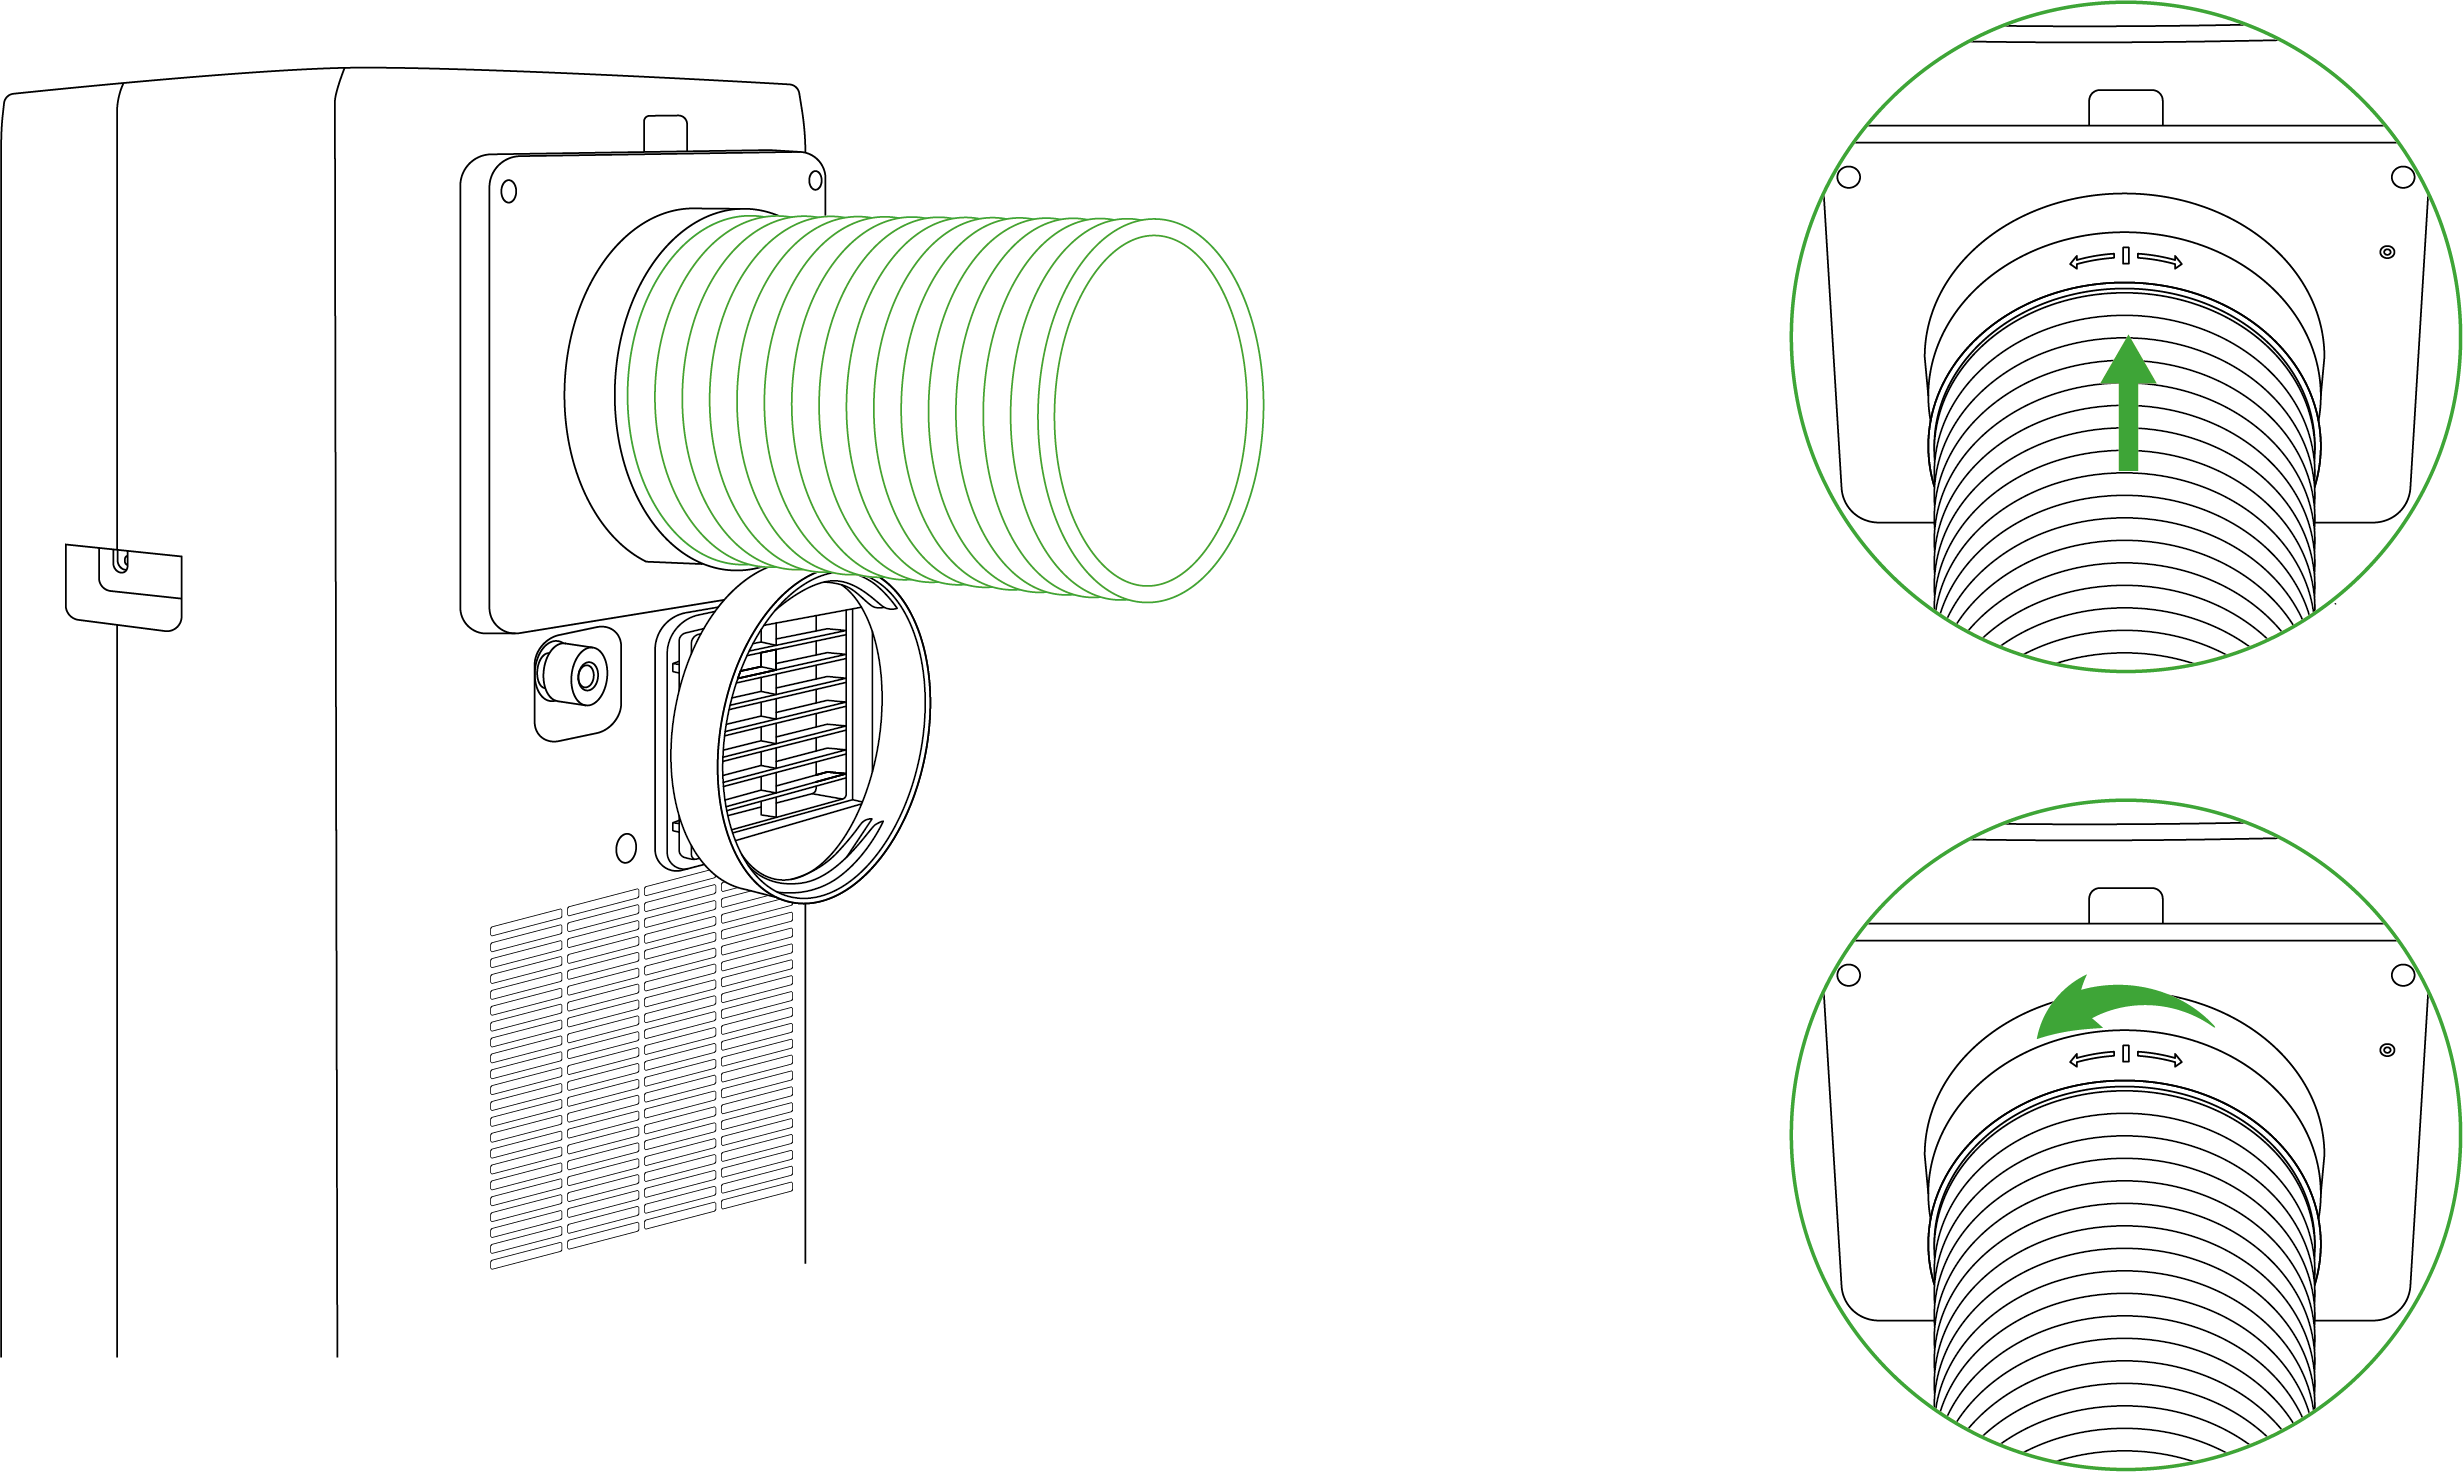
STEP 1.1
Insert the evaporator air outlet hood into the air conditioner’s evaporator air outlet, ensuring the correct top and bottom orientation of the hood.
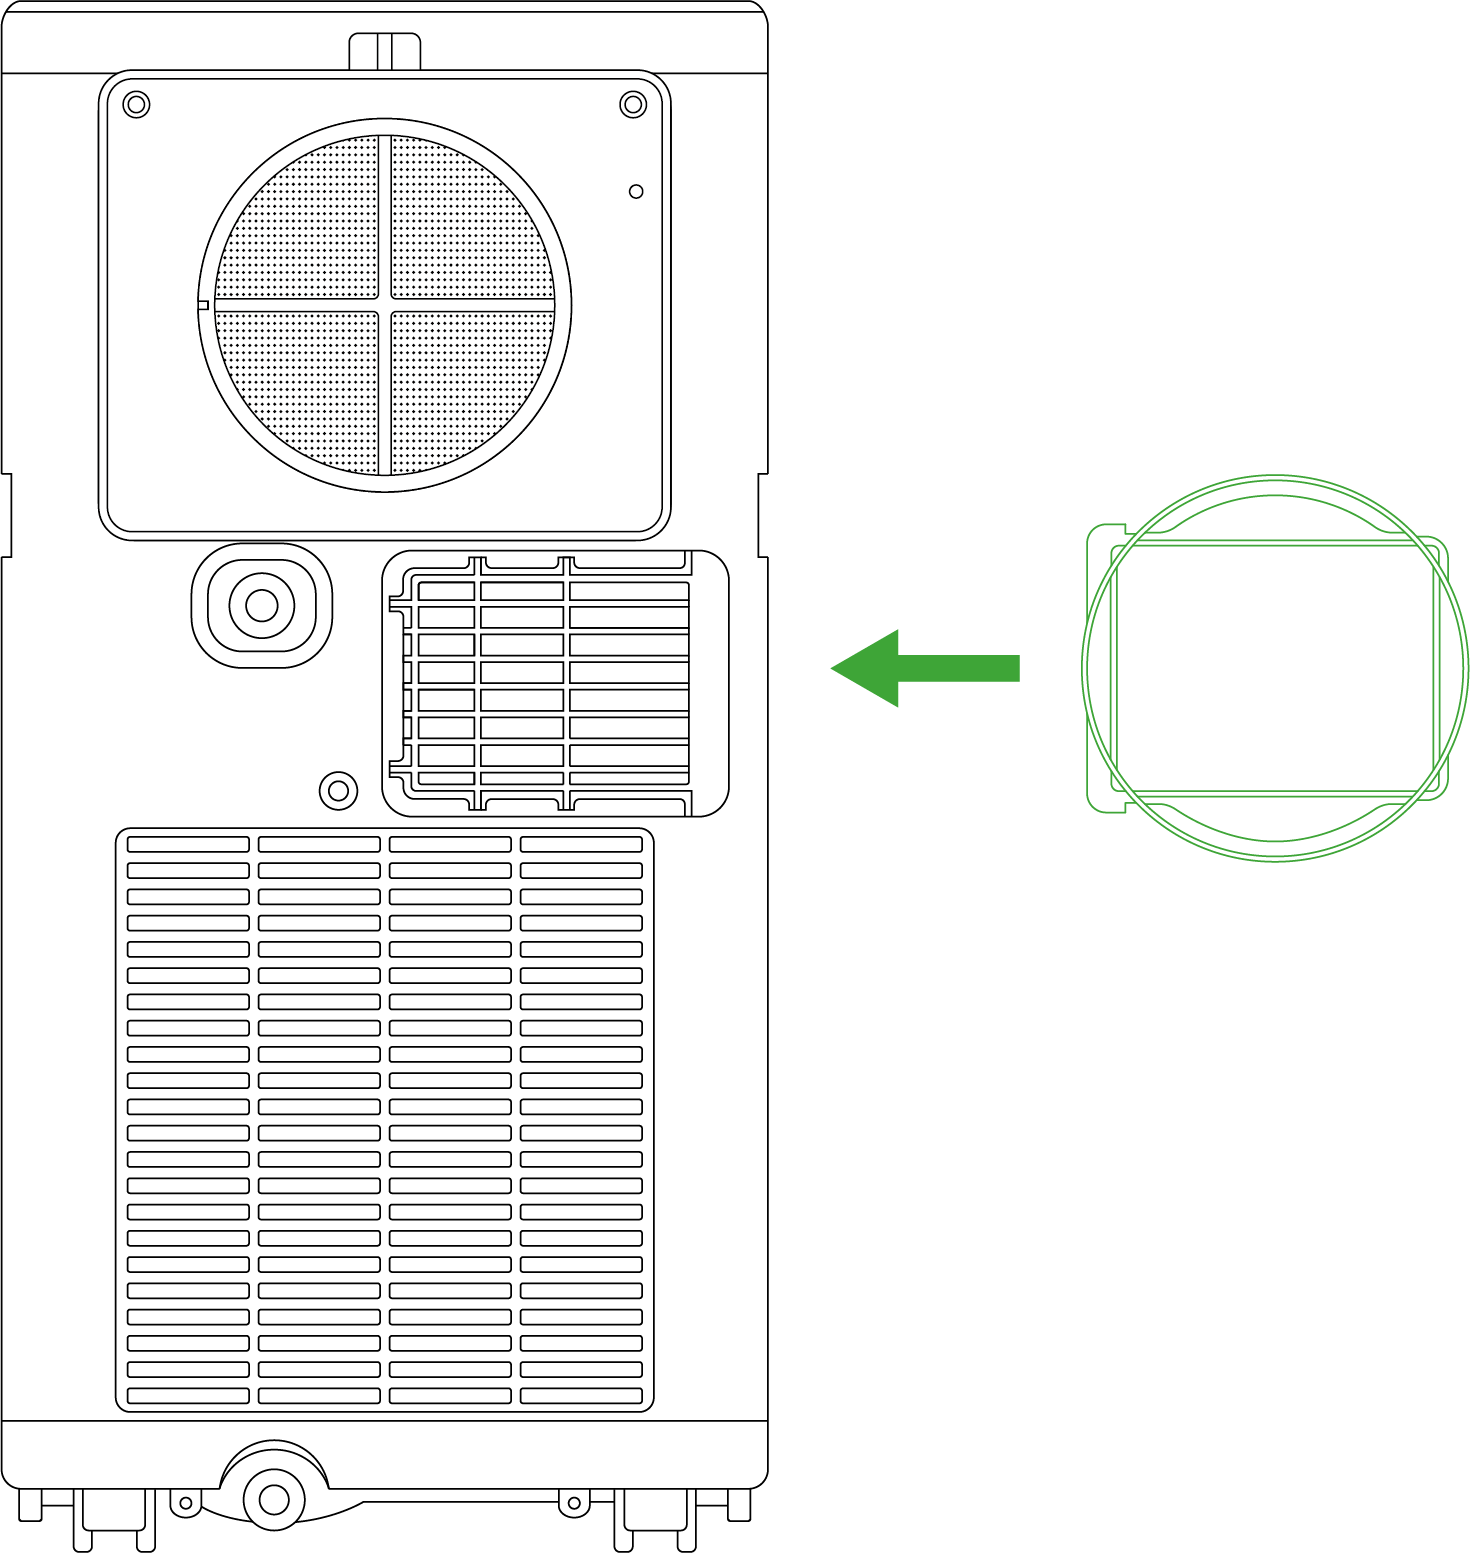
STEP 1.2
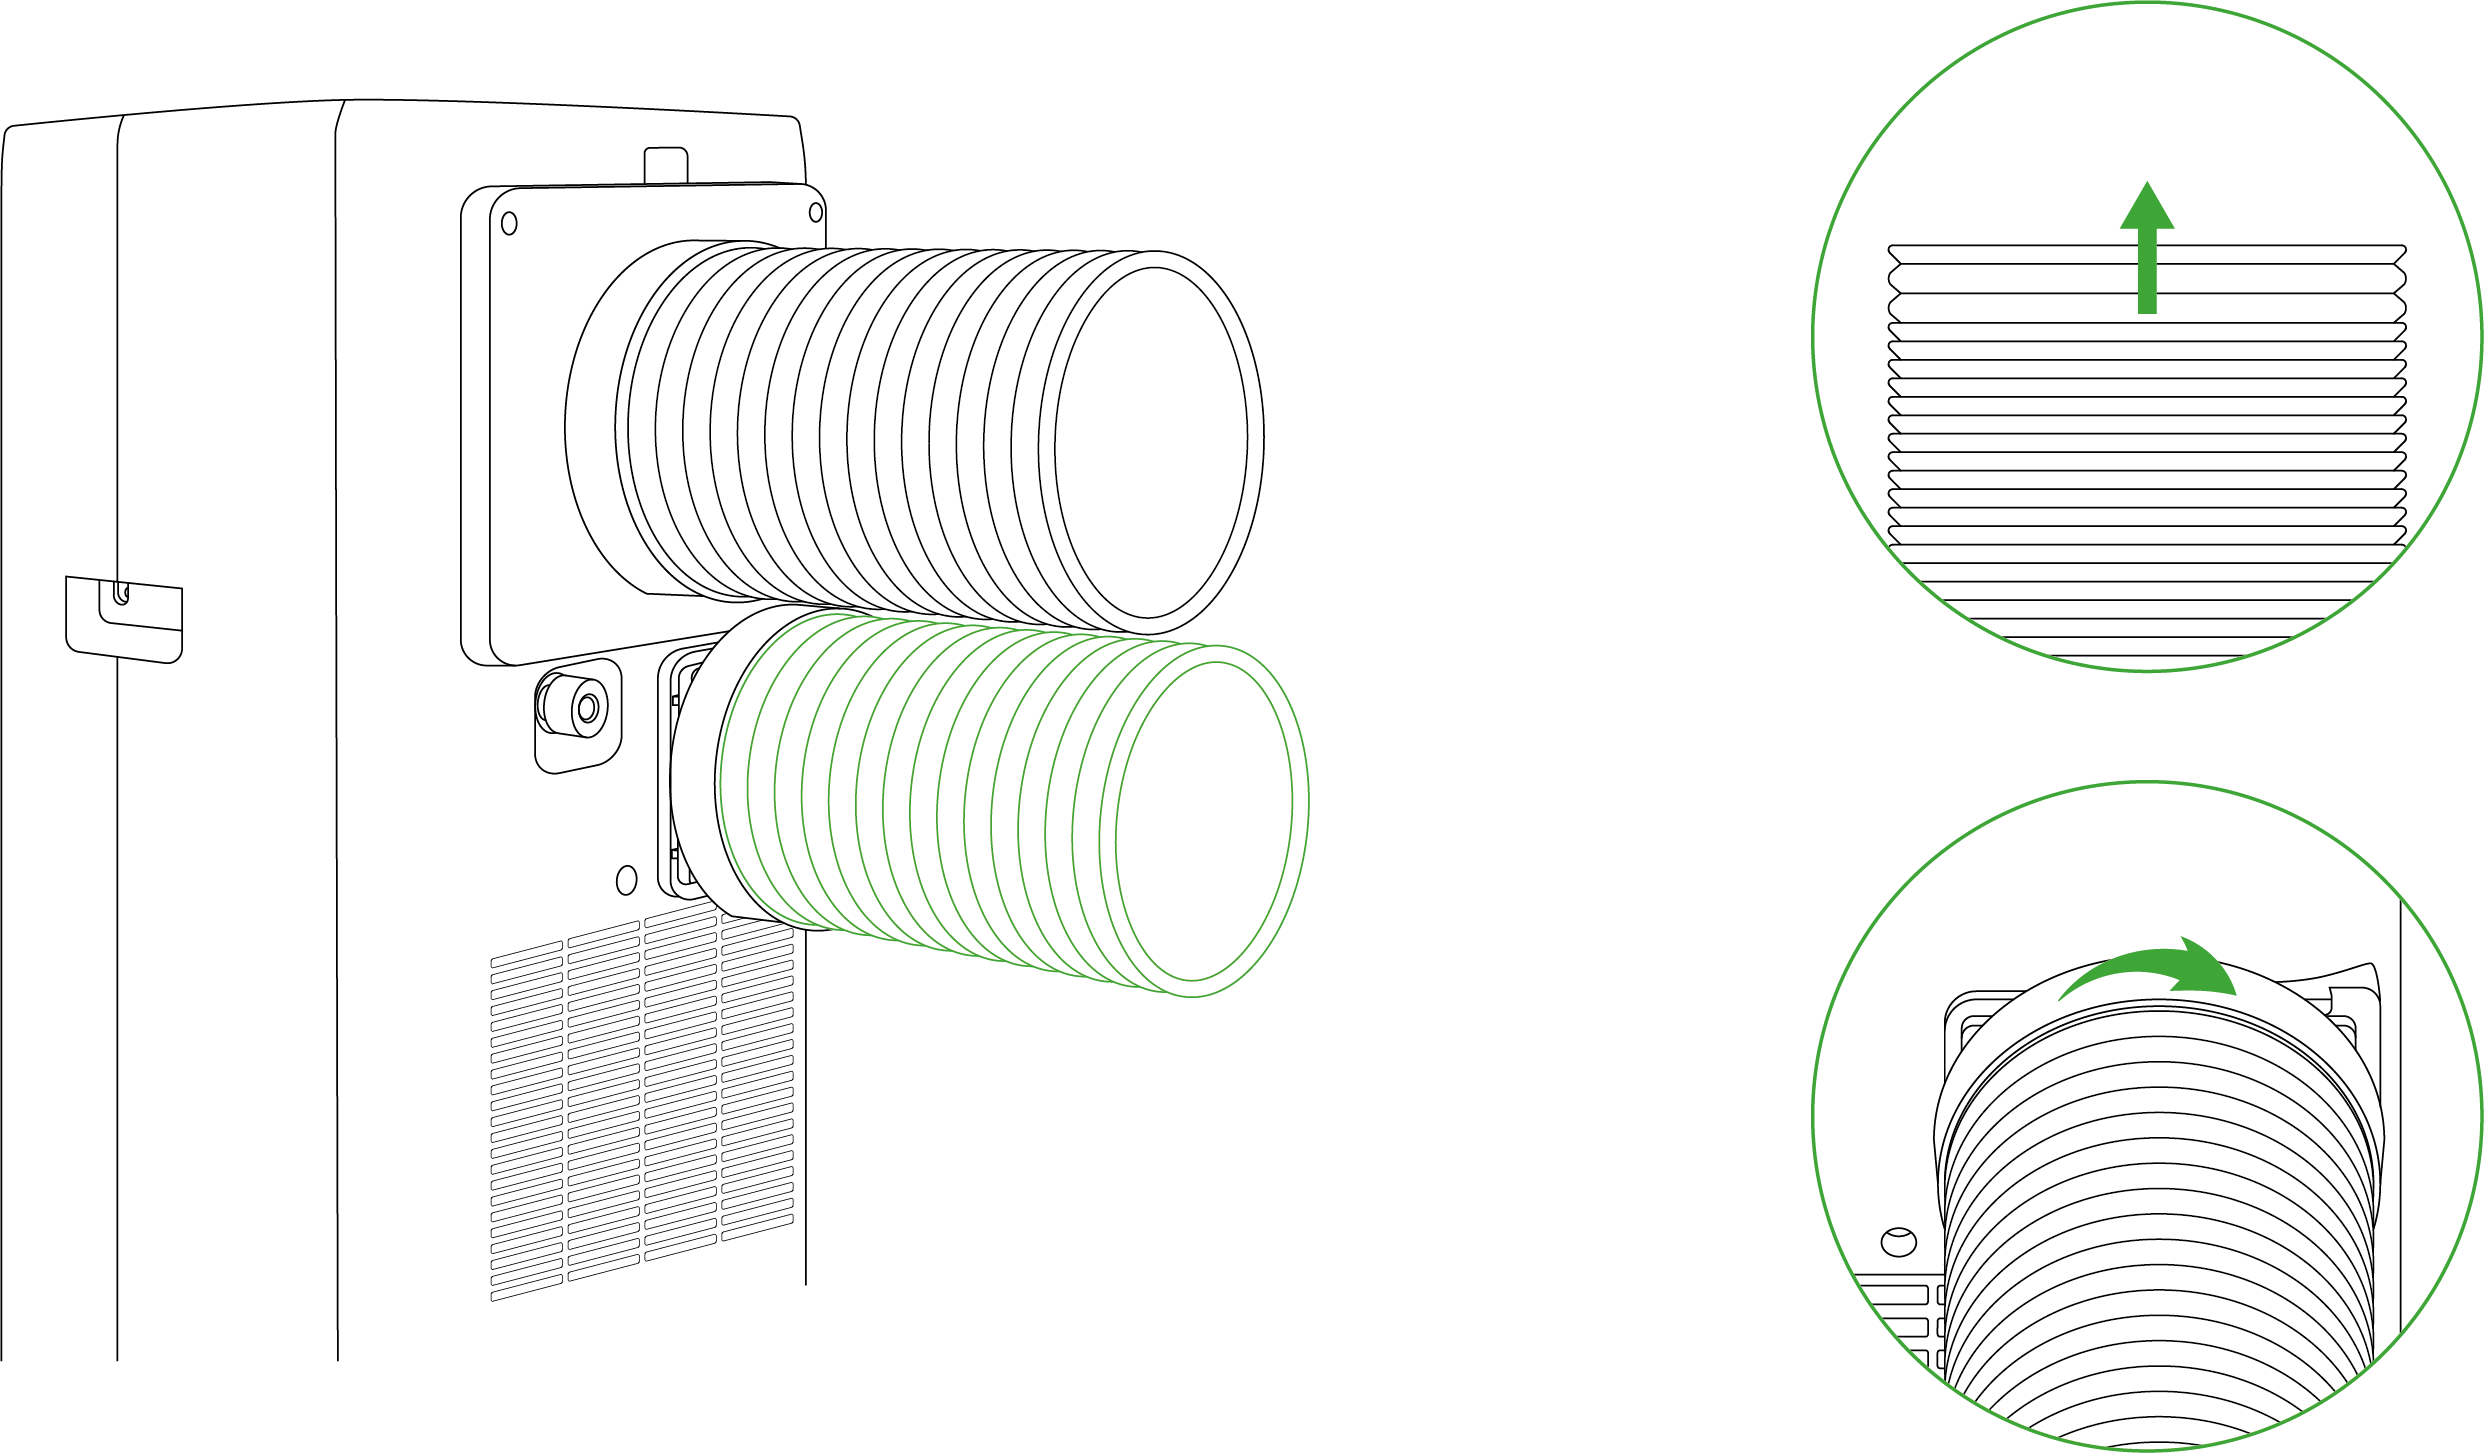
Insert the condenser connector horizontally into the condenser air outlet.
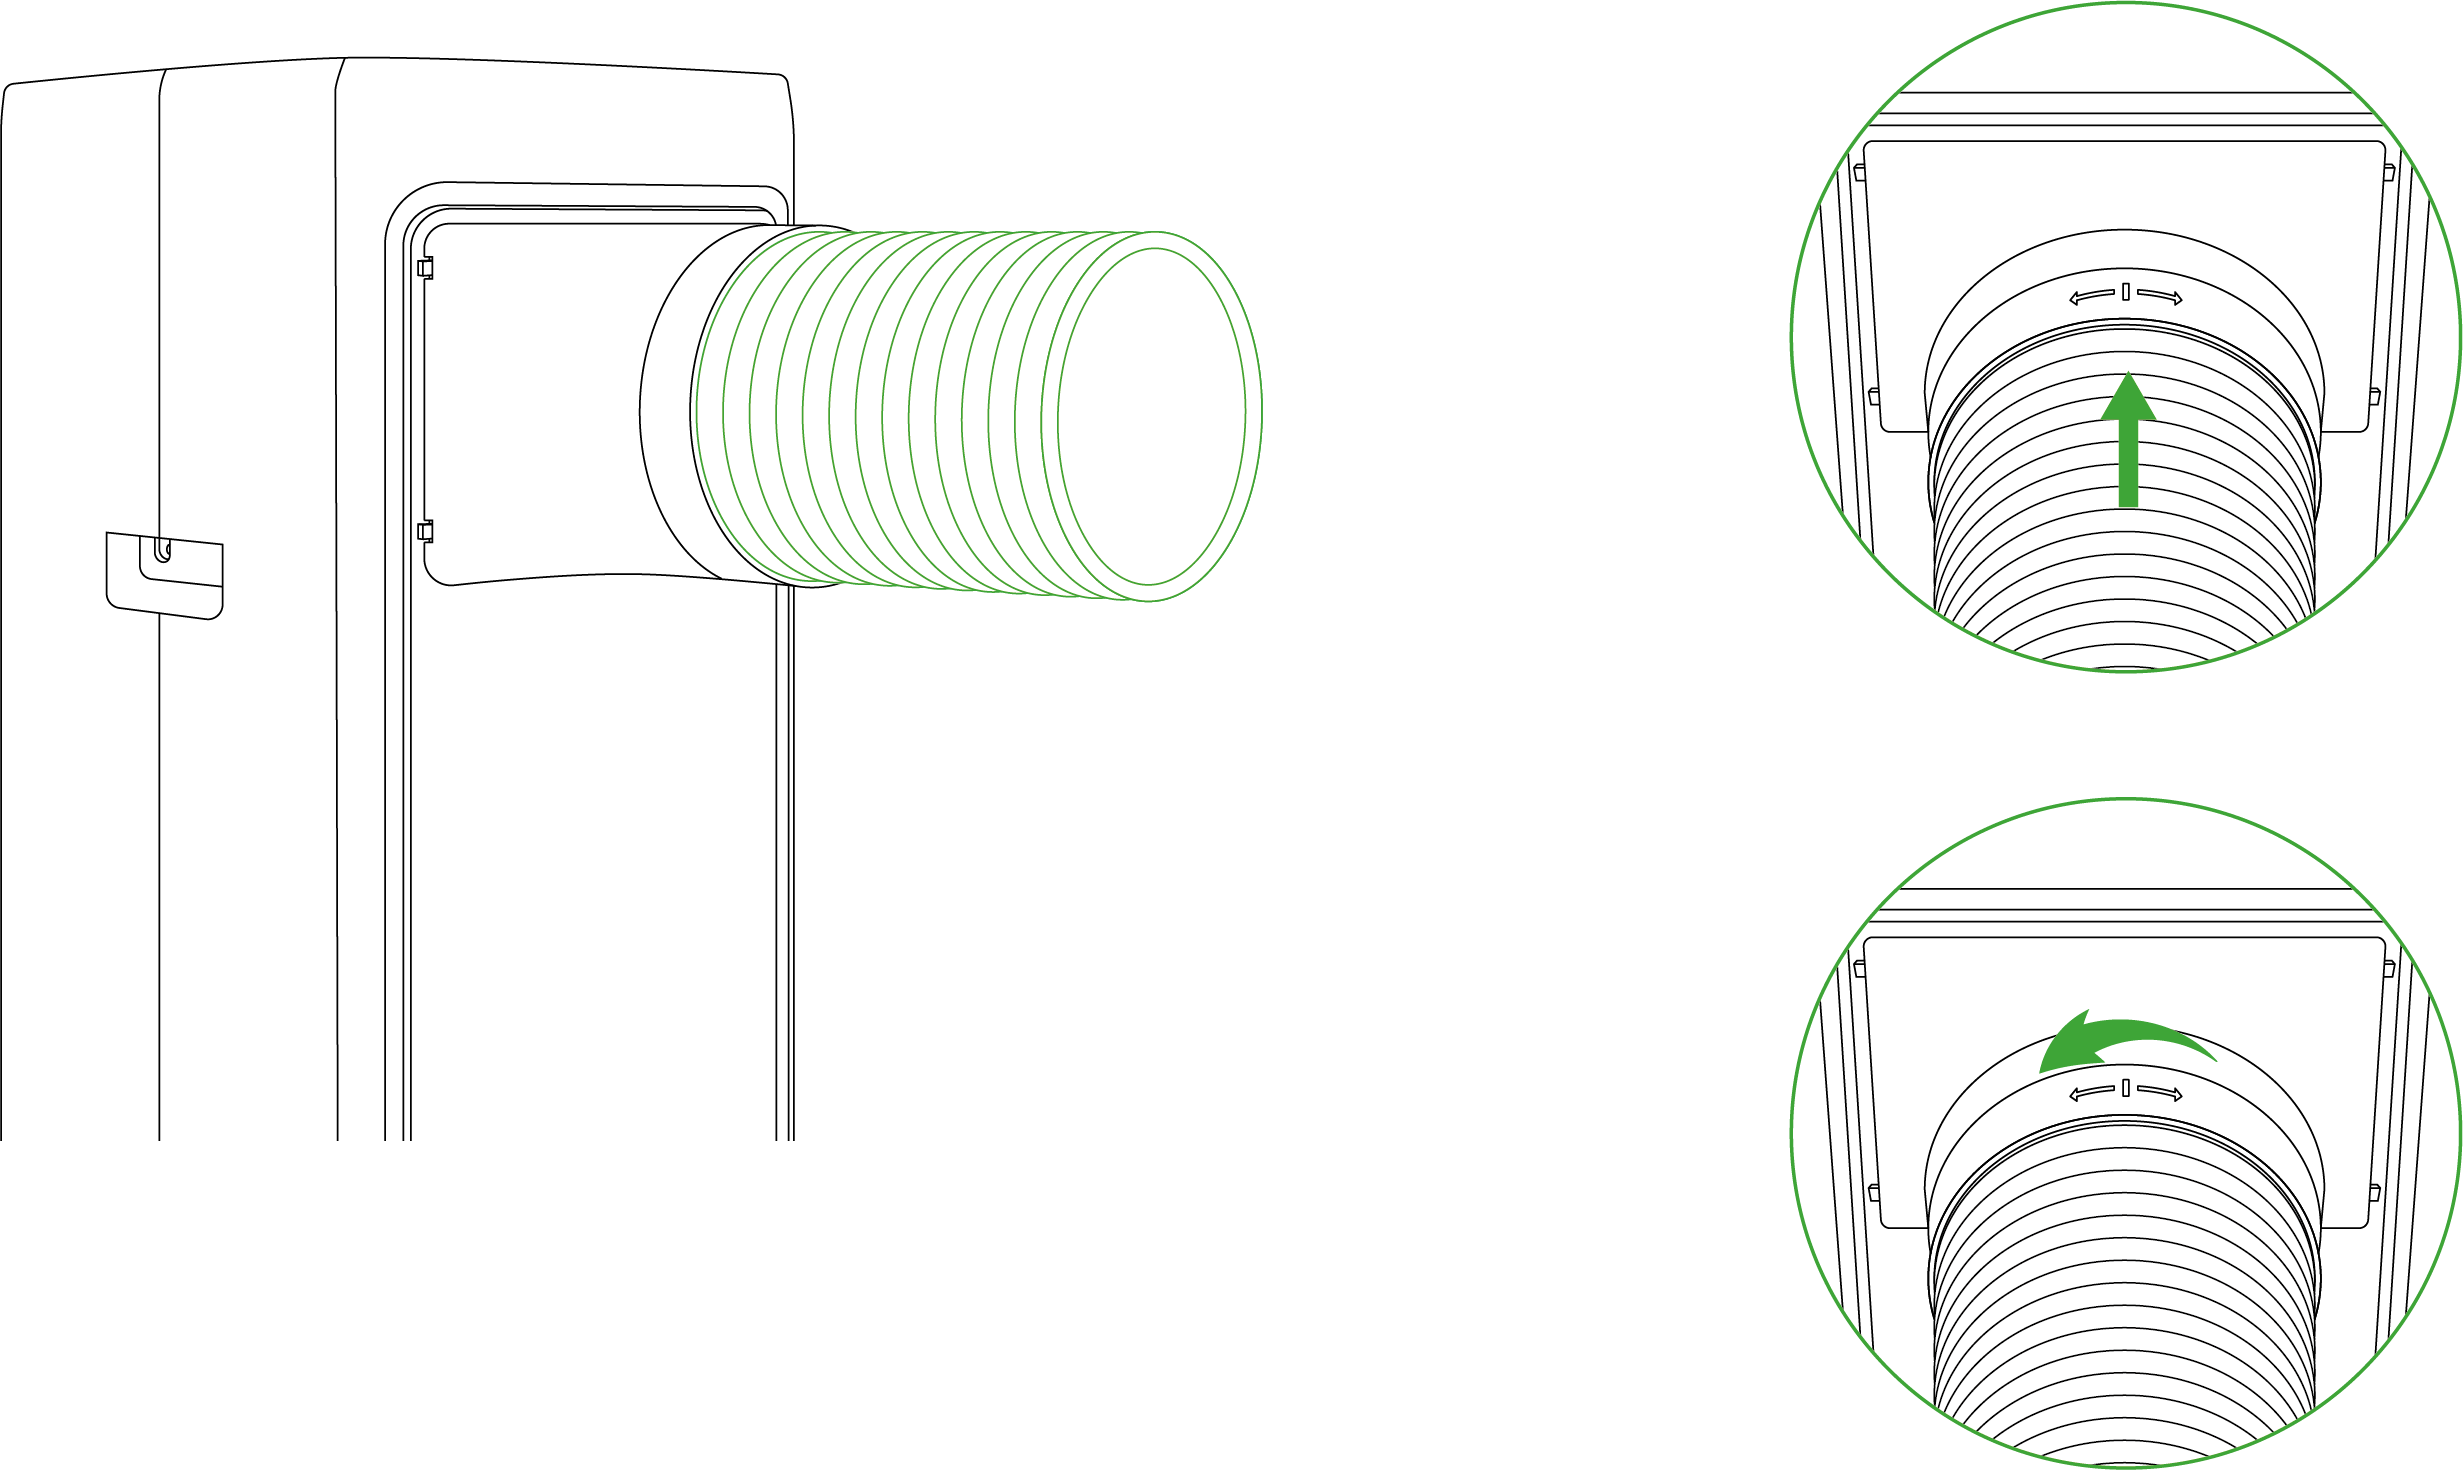
STEP 2.1
Take one piece of exhaust duct (2m with adapter) and connect it to the evaporator air outlet hood, then tighten it counterclockwise.
STEP 2.2
Take the other piece of exhaust duct (2m with adapter) and connect it to the evaporator air inlet hood, then tighten it counterclockwise.
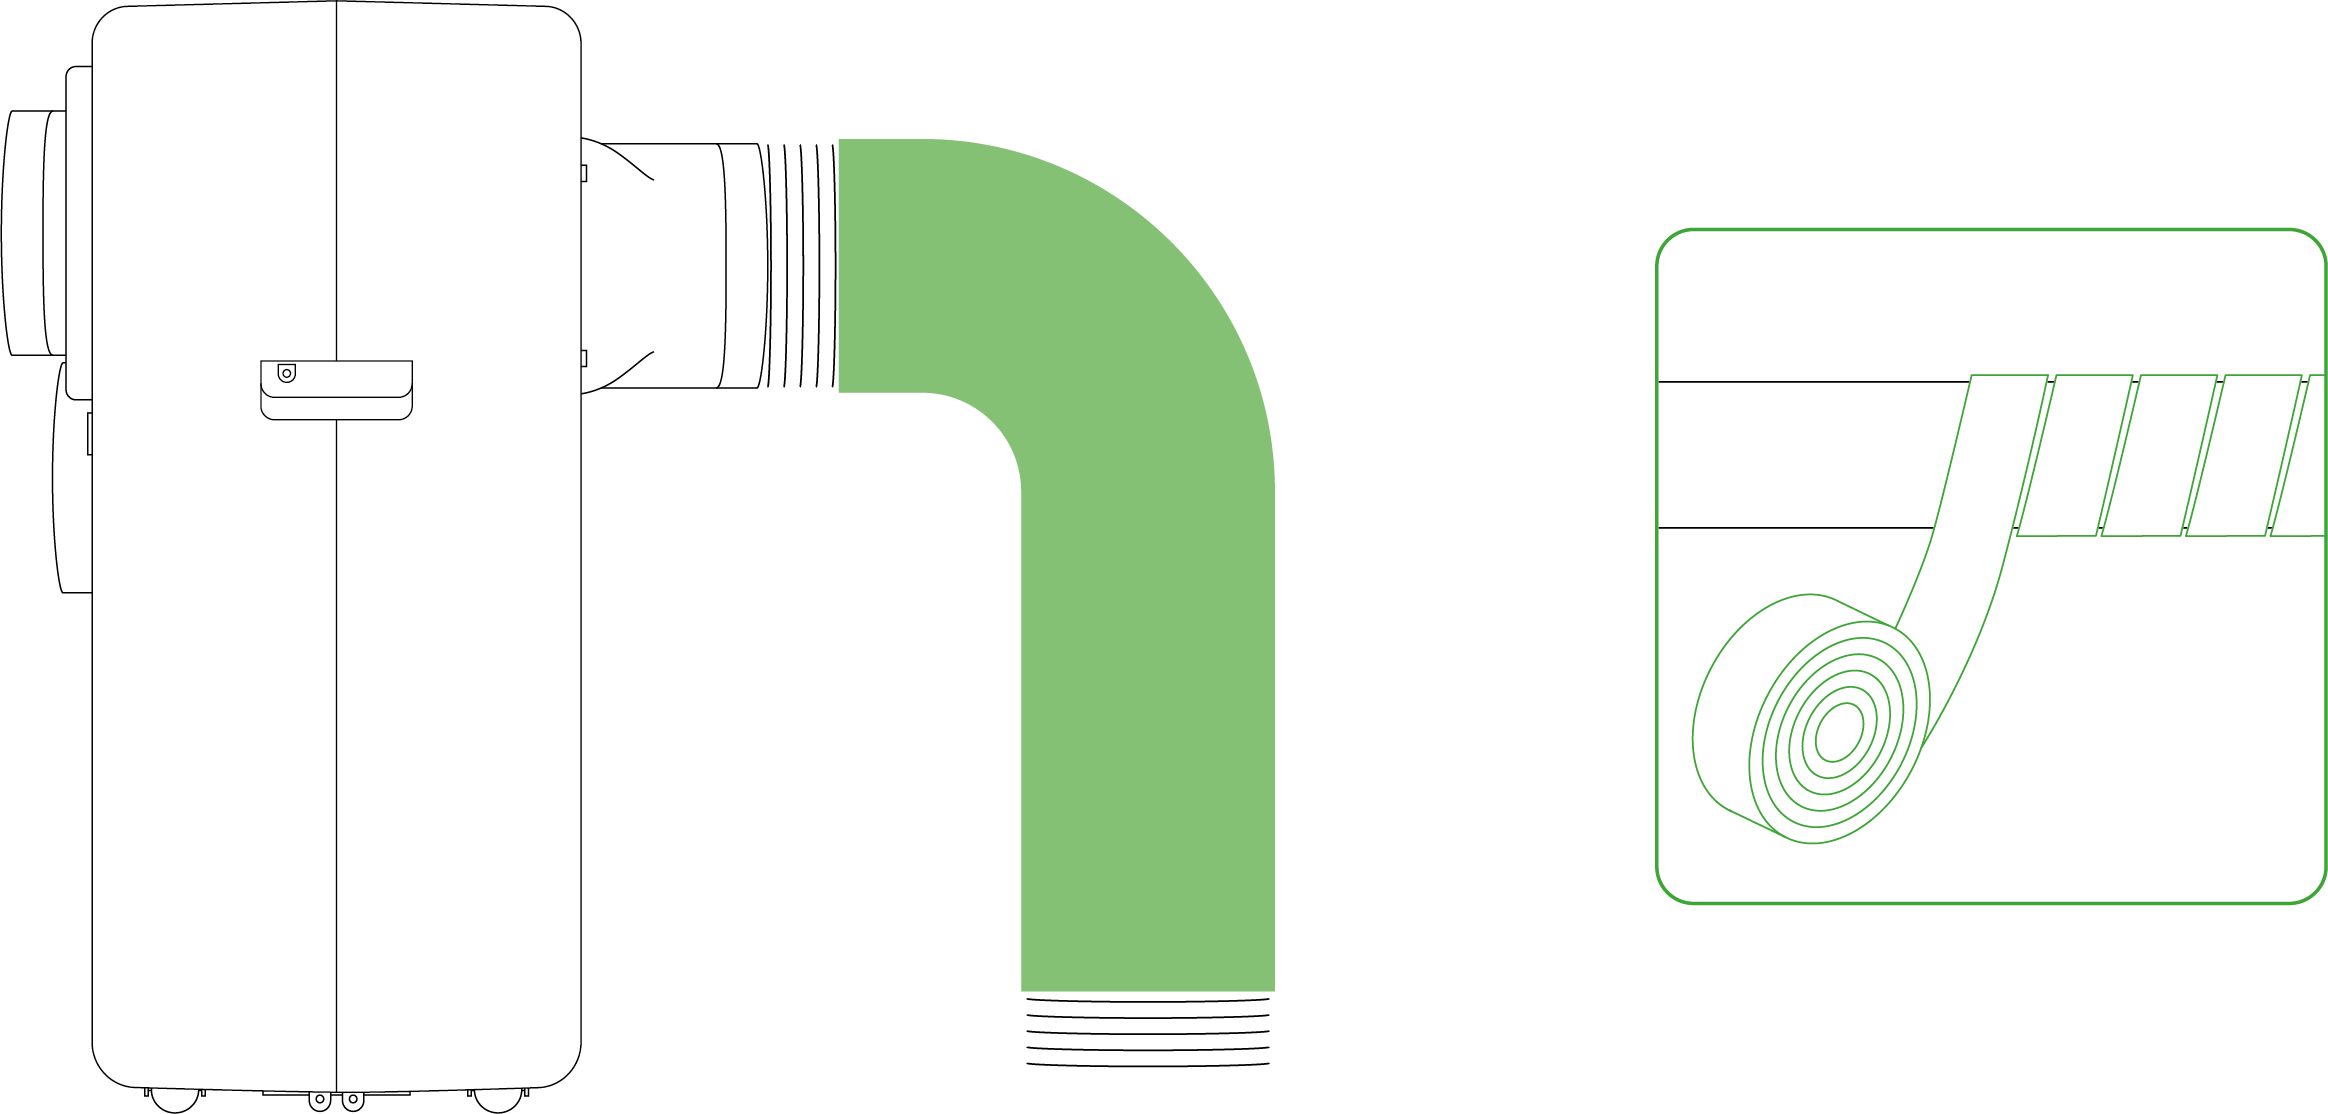
STEP 2.3
Take one exhaust duct, pull out a portion from the duct’s end, and then screw it clockwise into the condenser outlet adapter.
STEP 3
Ensure that the adapter, hoods, and ducts are securely installed and properly fitted in place.
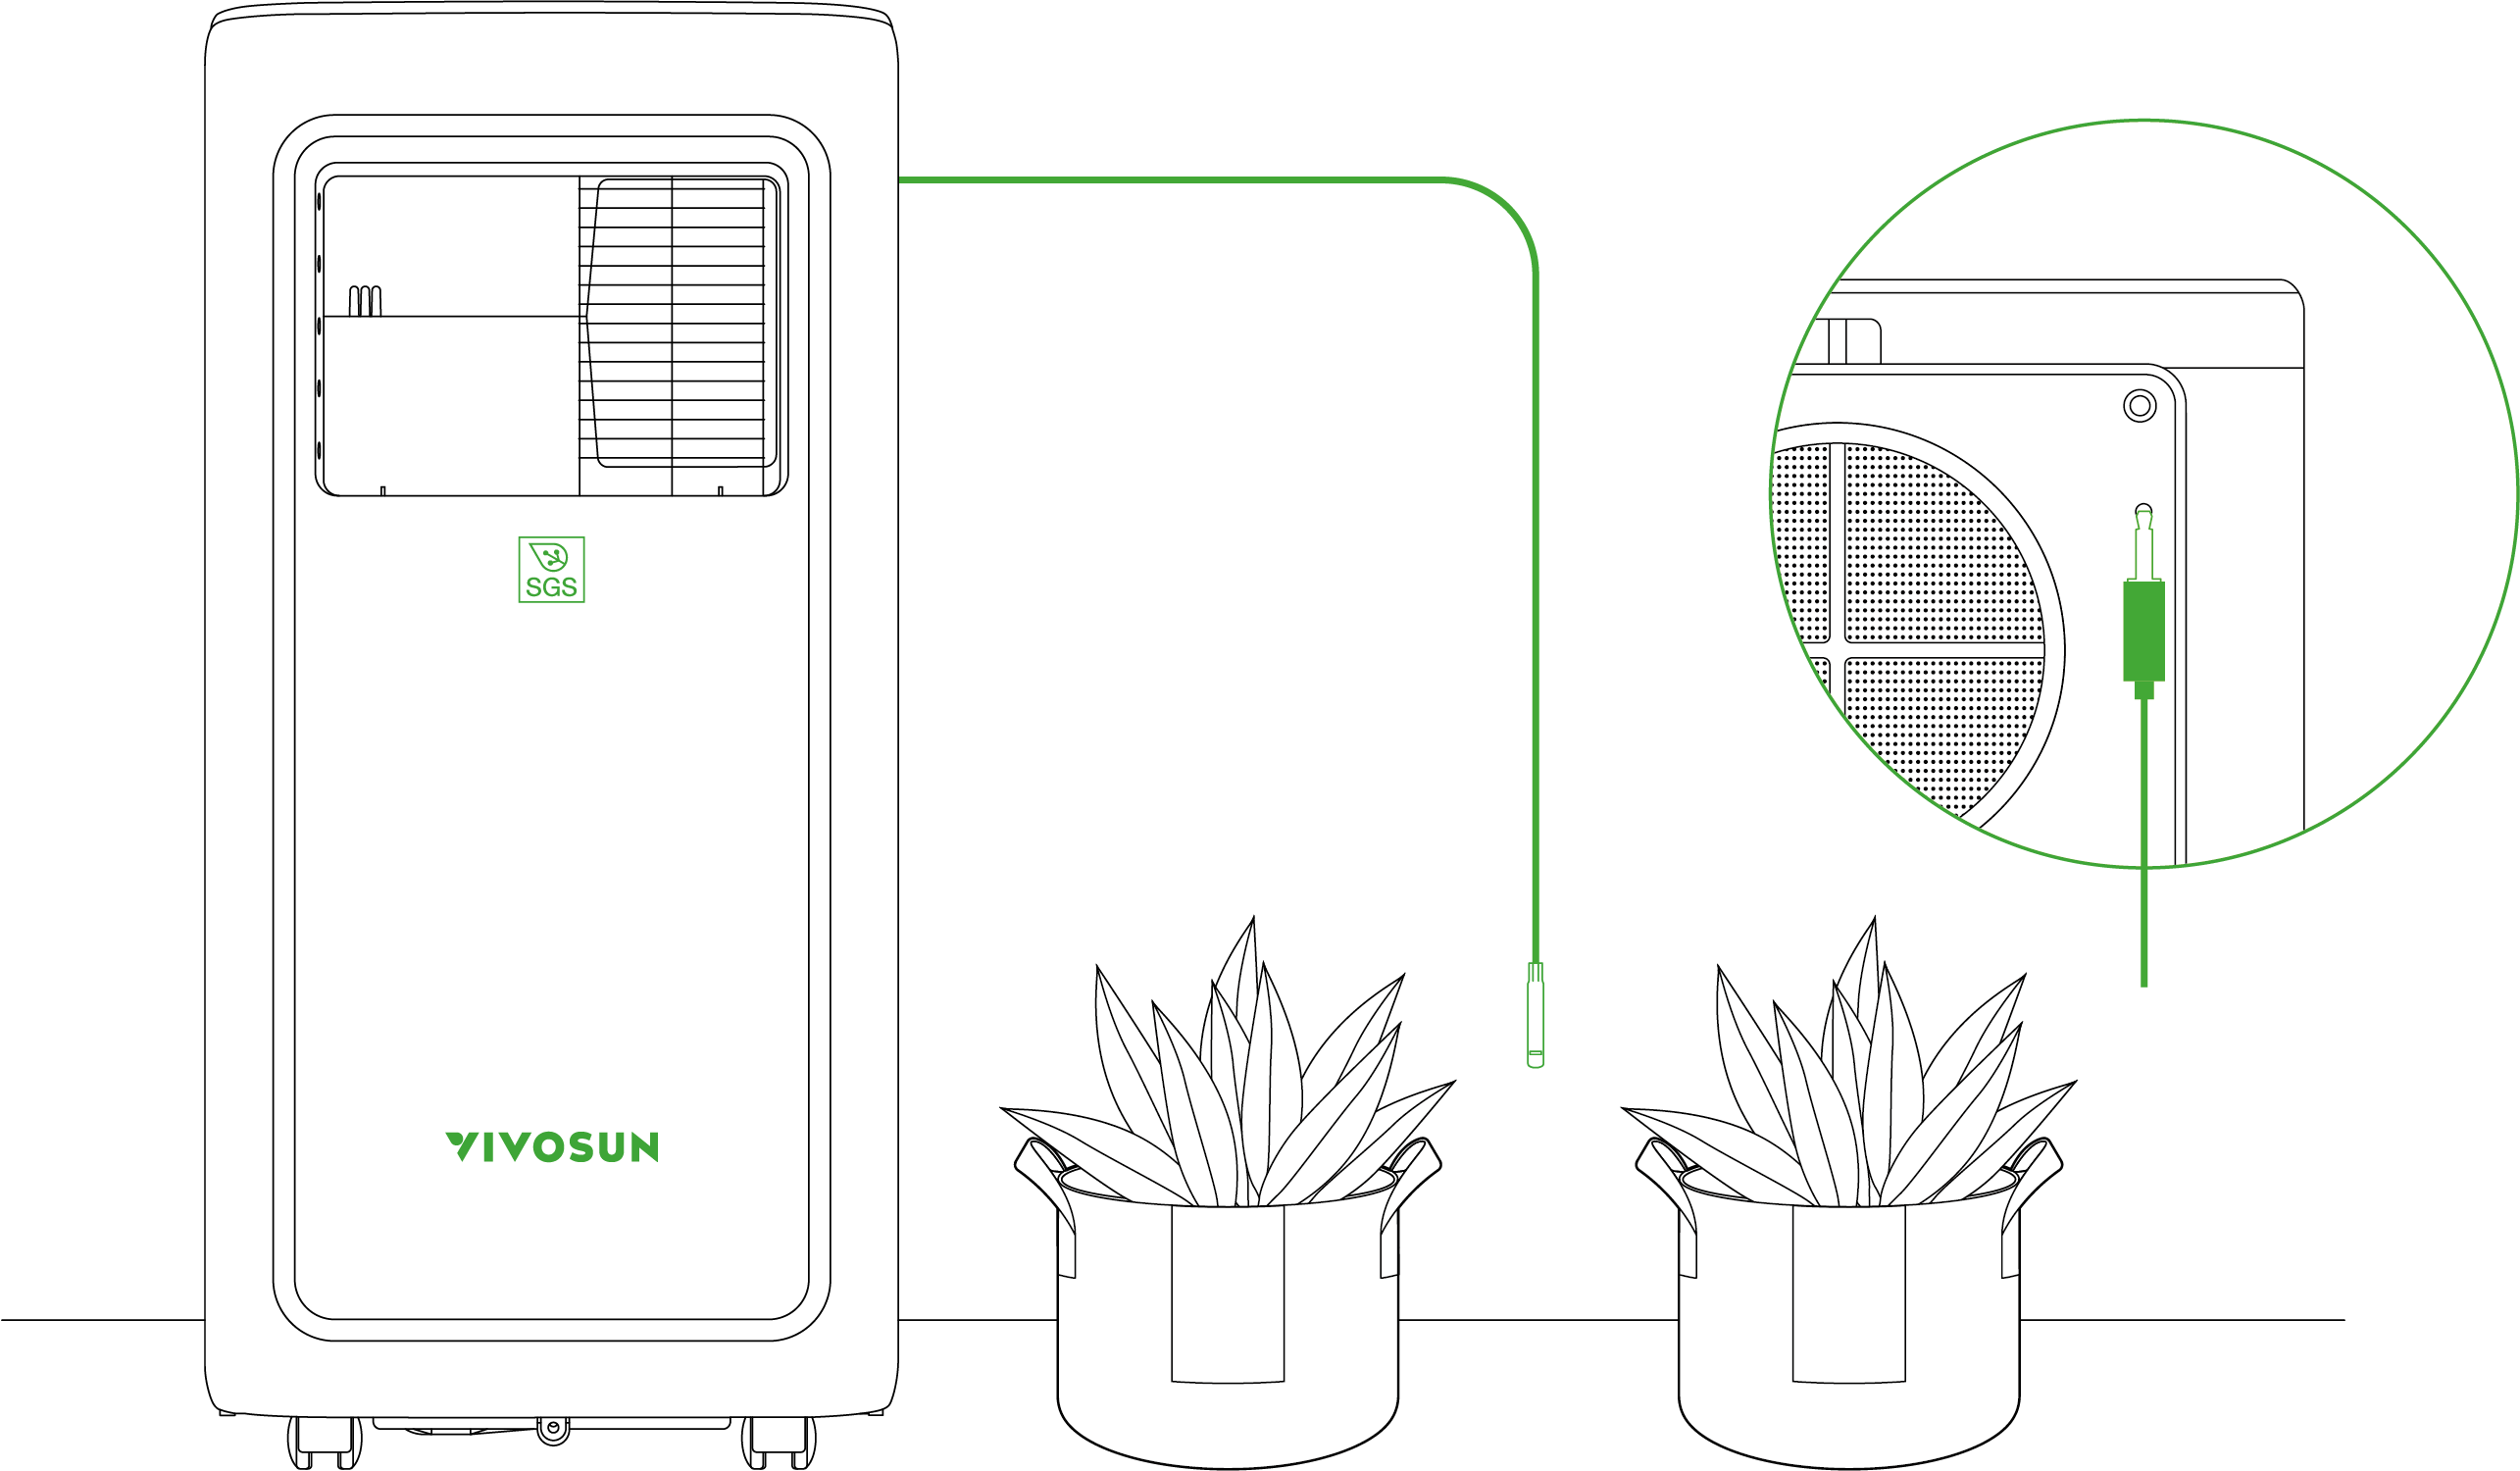
Installation of Probe
STEP 1
Insert the temperature and humidity probe into the 2.5mm jack on the right side of the evaporator air inlet hood, ensuring it is securely in place.
Note: If the probe is not connected, the screen will display “–”.
STEP 2
Place the probe in the target area and secure it.
Note: It is recommended to position the sensor at a height of 2 to 4 inches above the canop
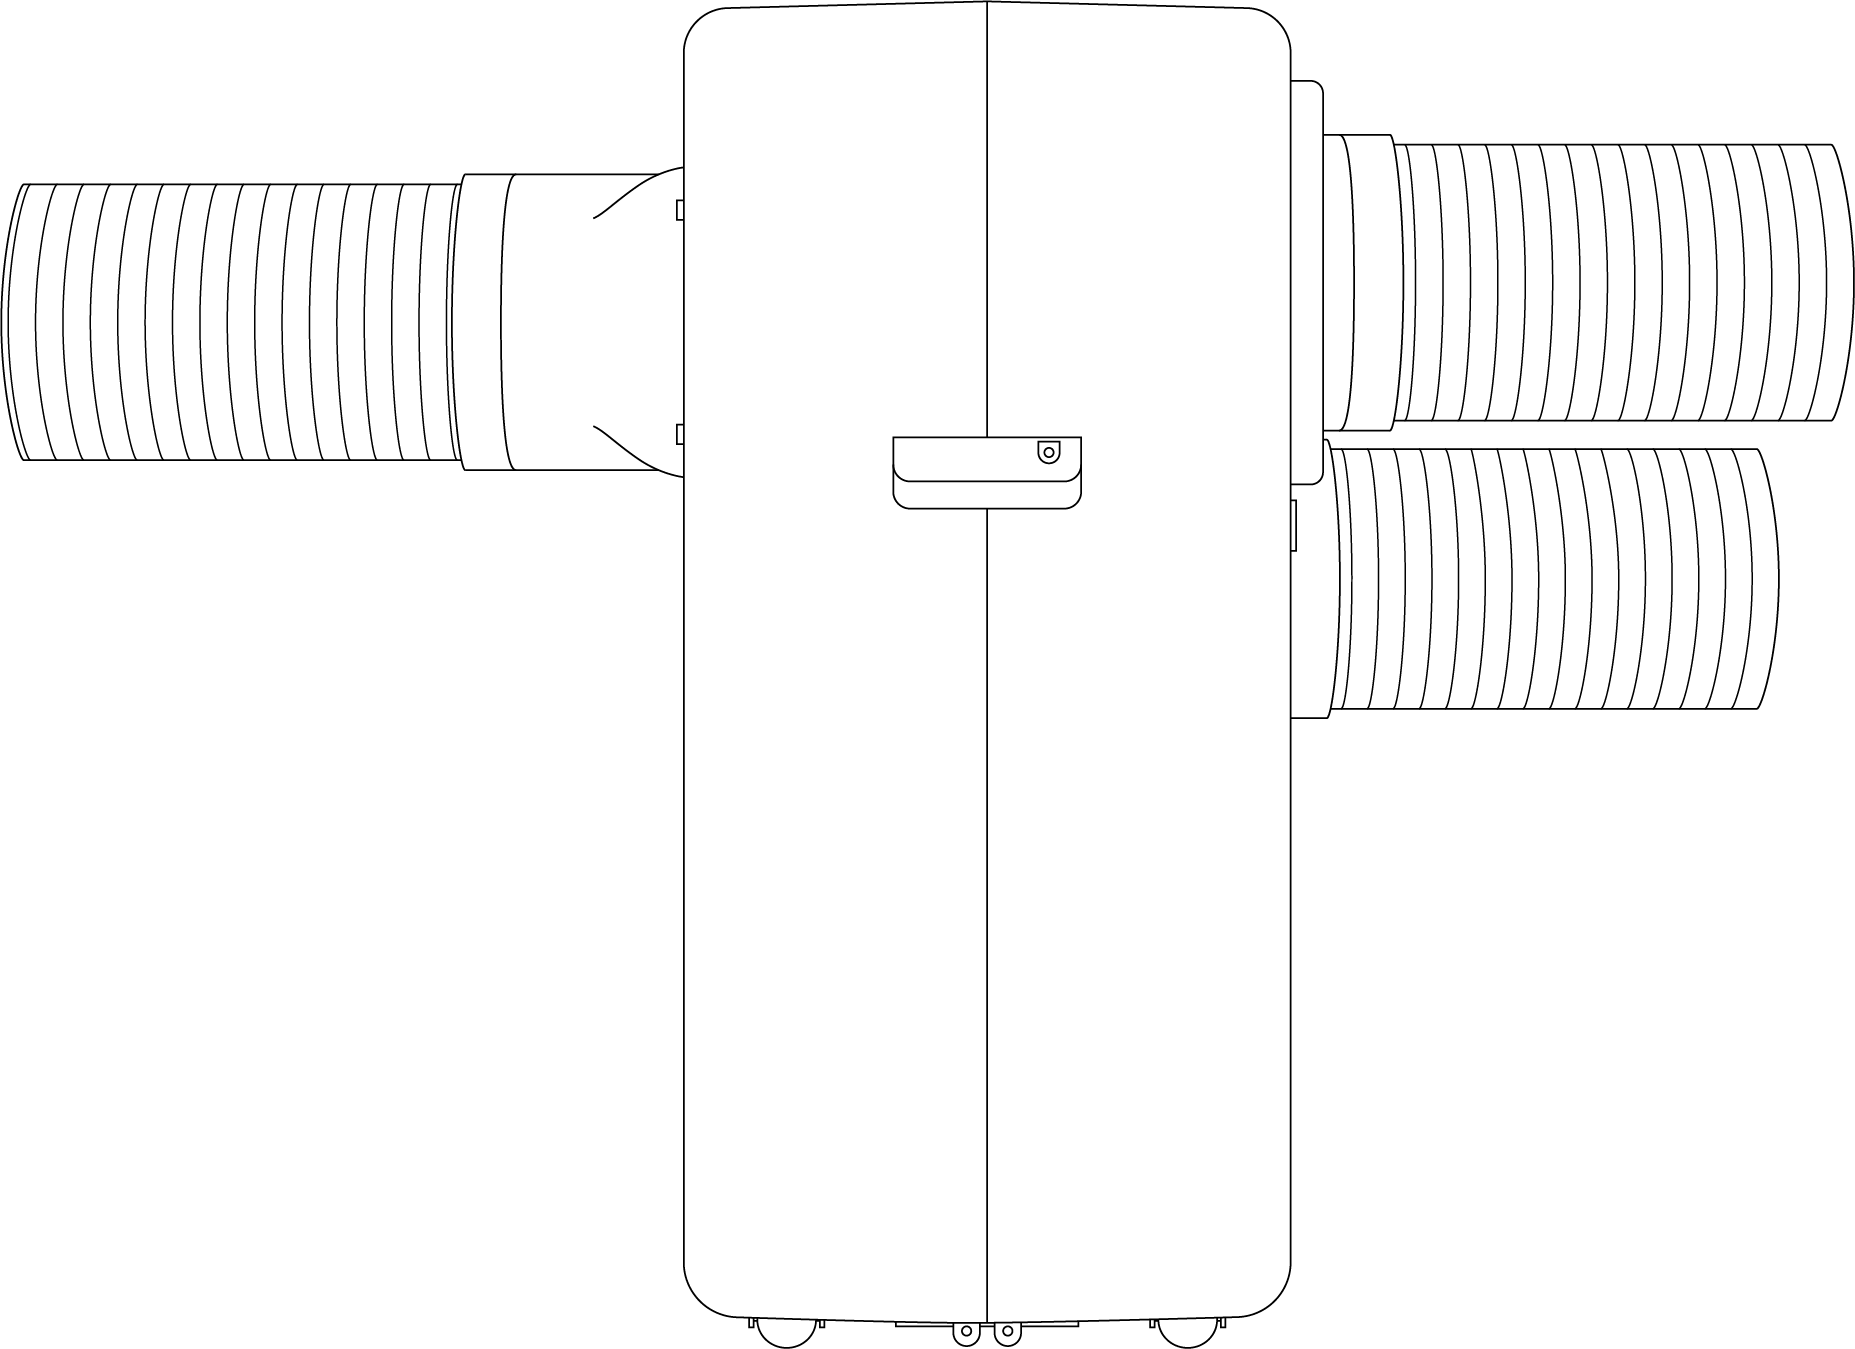
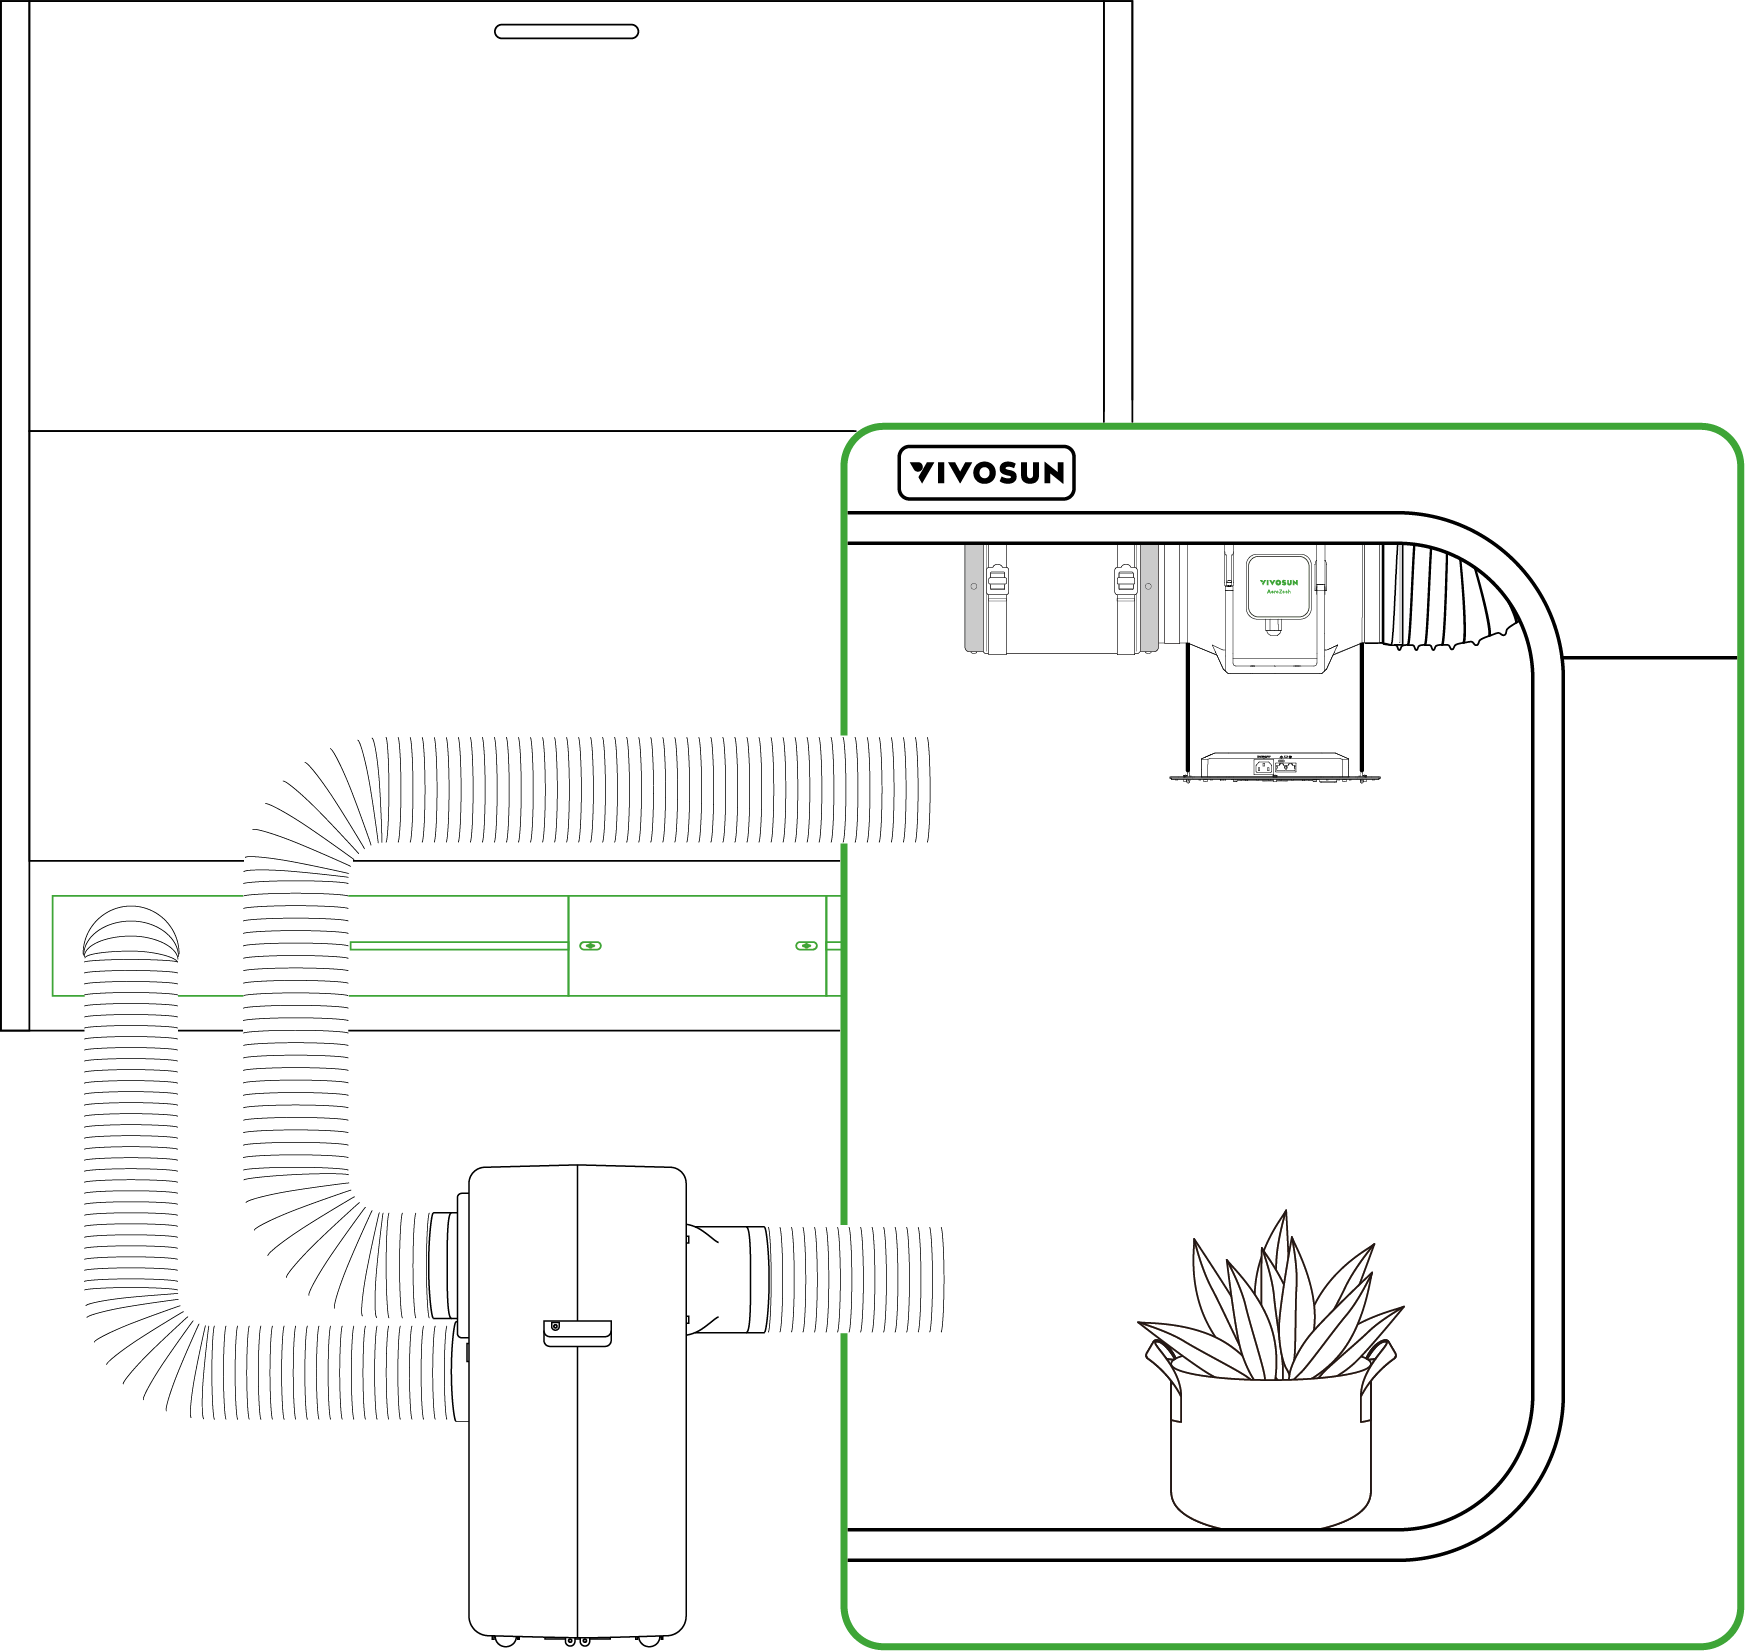
Configuration of Duct Configuration
A.Cool Mode & Dry Mode
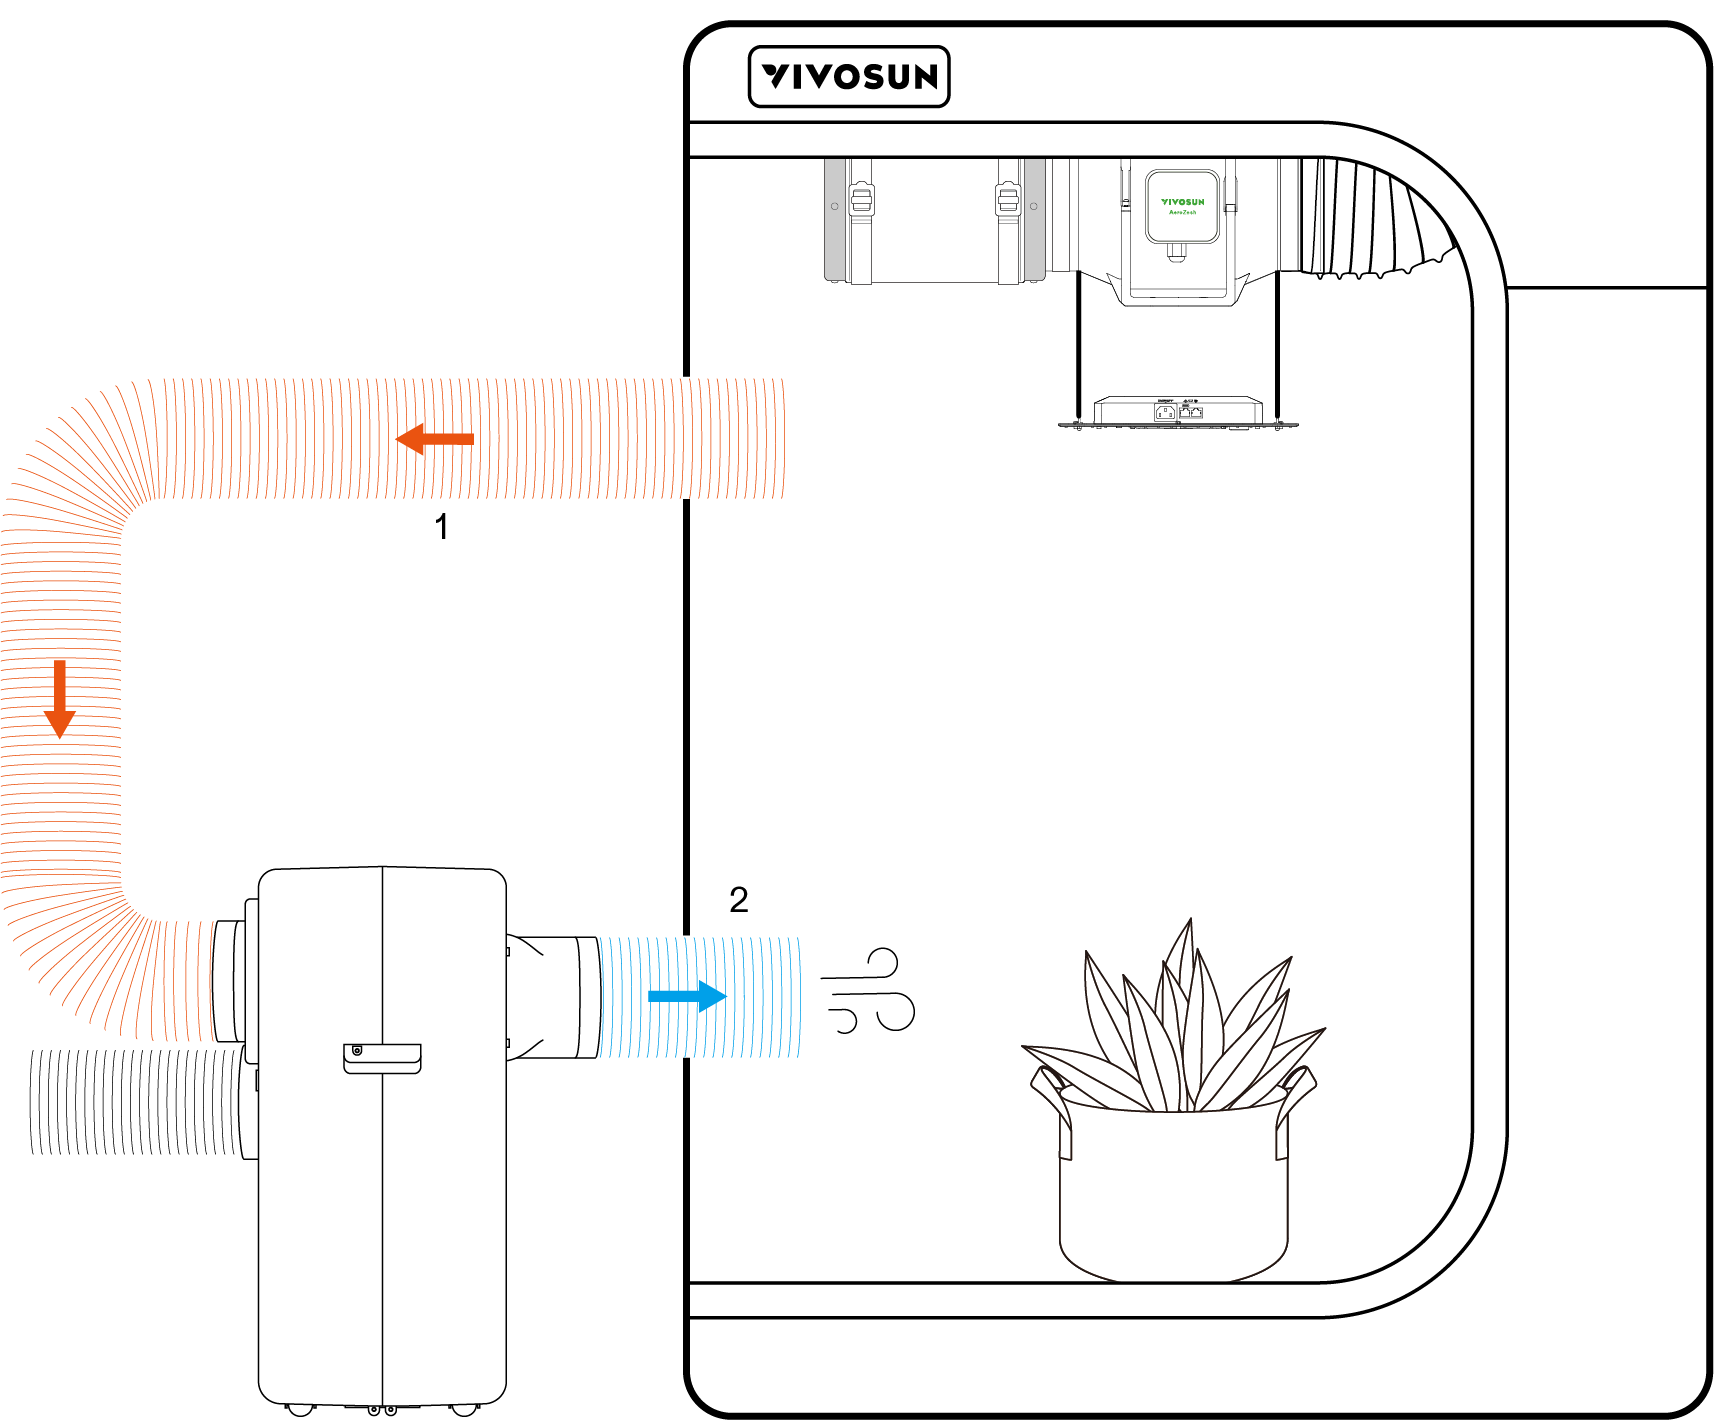
*1. Evaporator Air Inlet
 2. Evaporator Air Outlet
B.Heat Mode
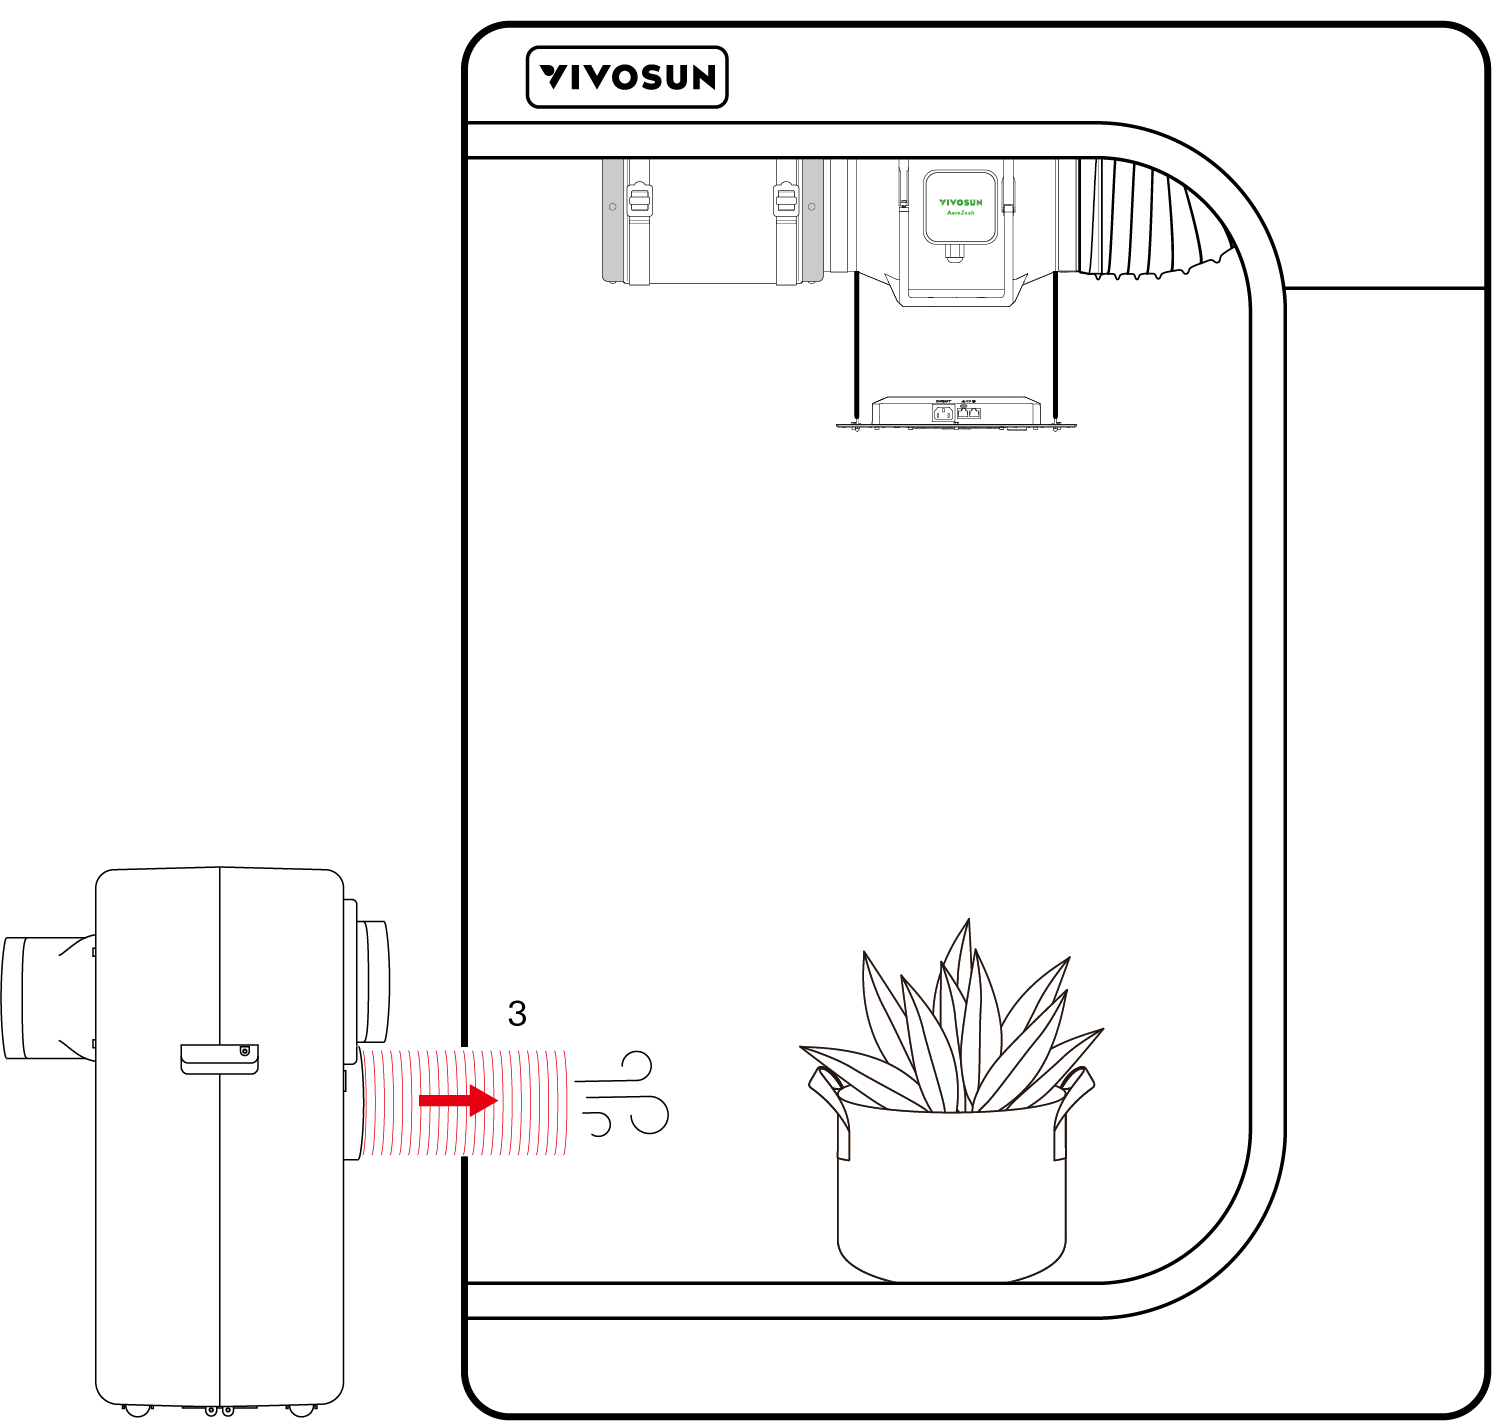
*3. Condenser Air Outlet
Note: When using heat mode, it is essential to switch the duct connection.
C.Fan Mode
In Fan Mode, there are no specific connection requirements. You may refer to other modes or install the duct as needed based on your setup.
Note:
1.Ensure the exhaust duct does not have bends greater than 45°, as this can affect the air conditioner’s performance.
2.The exhaust duct inside the tent should be positioned upwards, avoiding direct airflow onto the leaves.
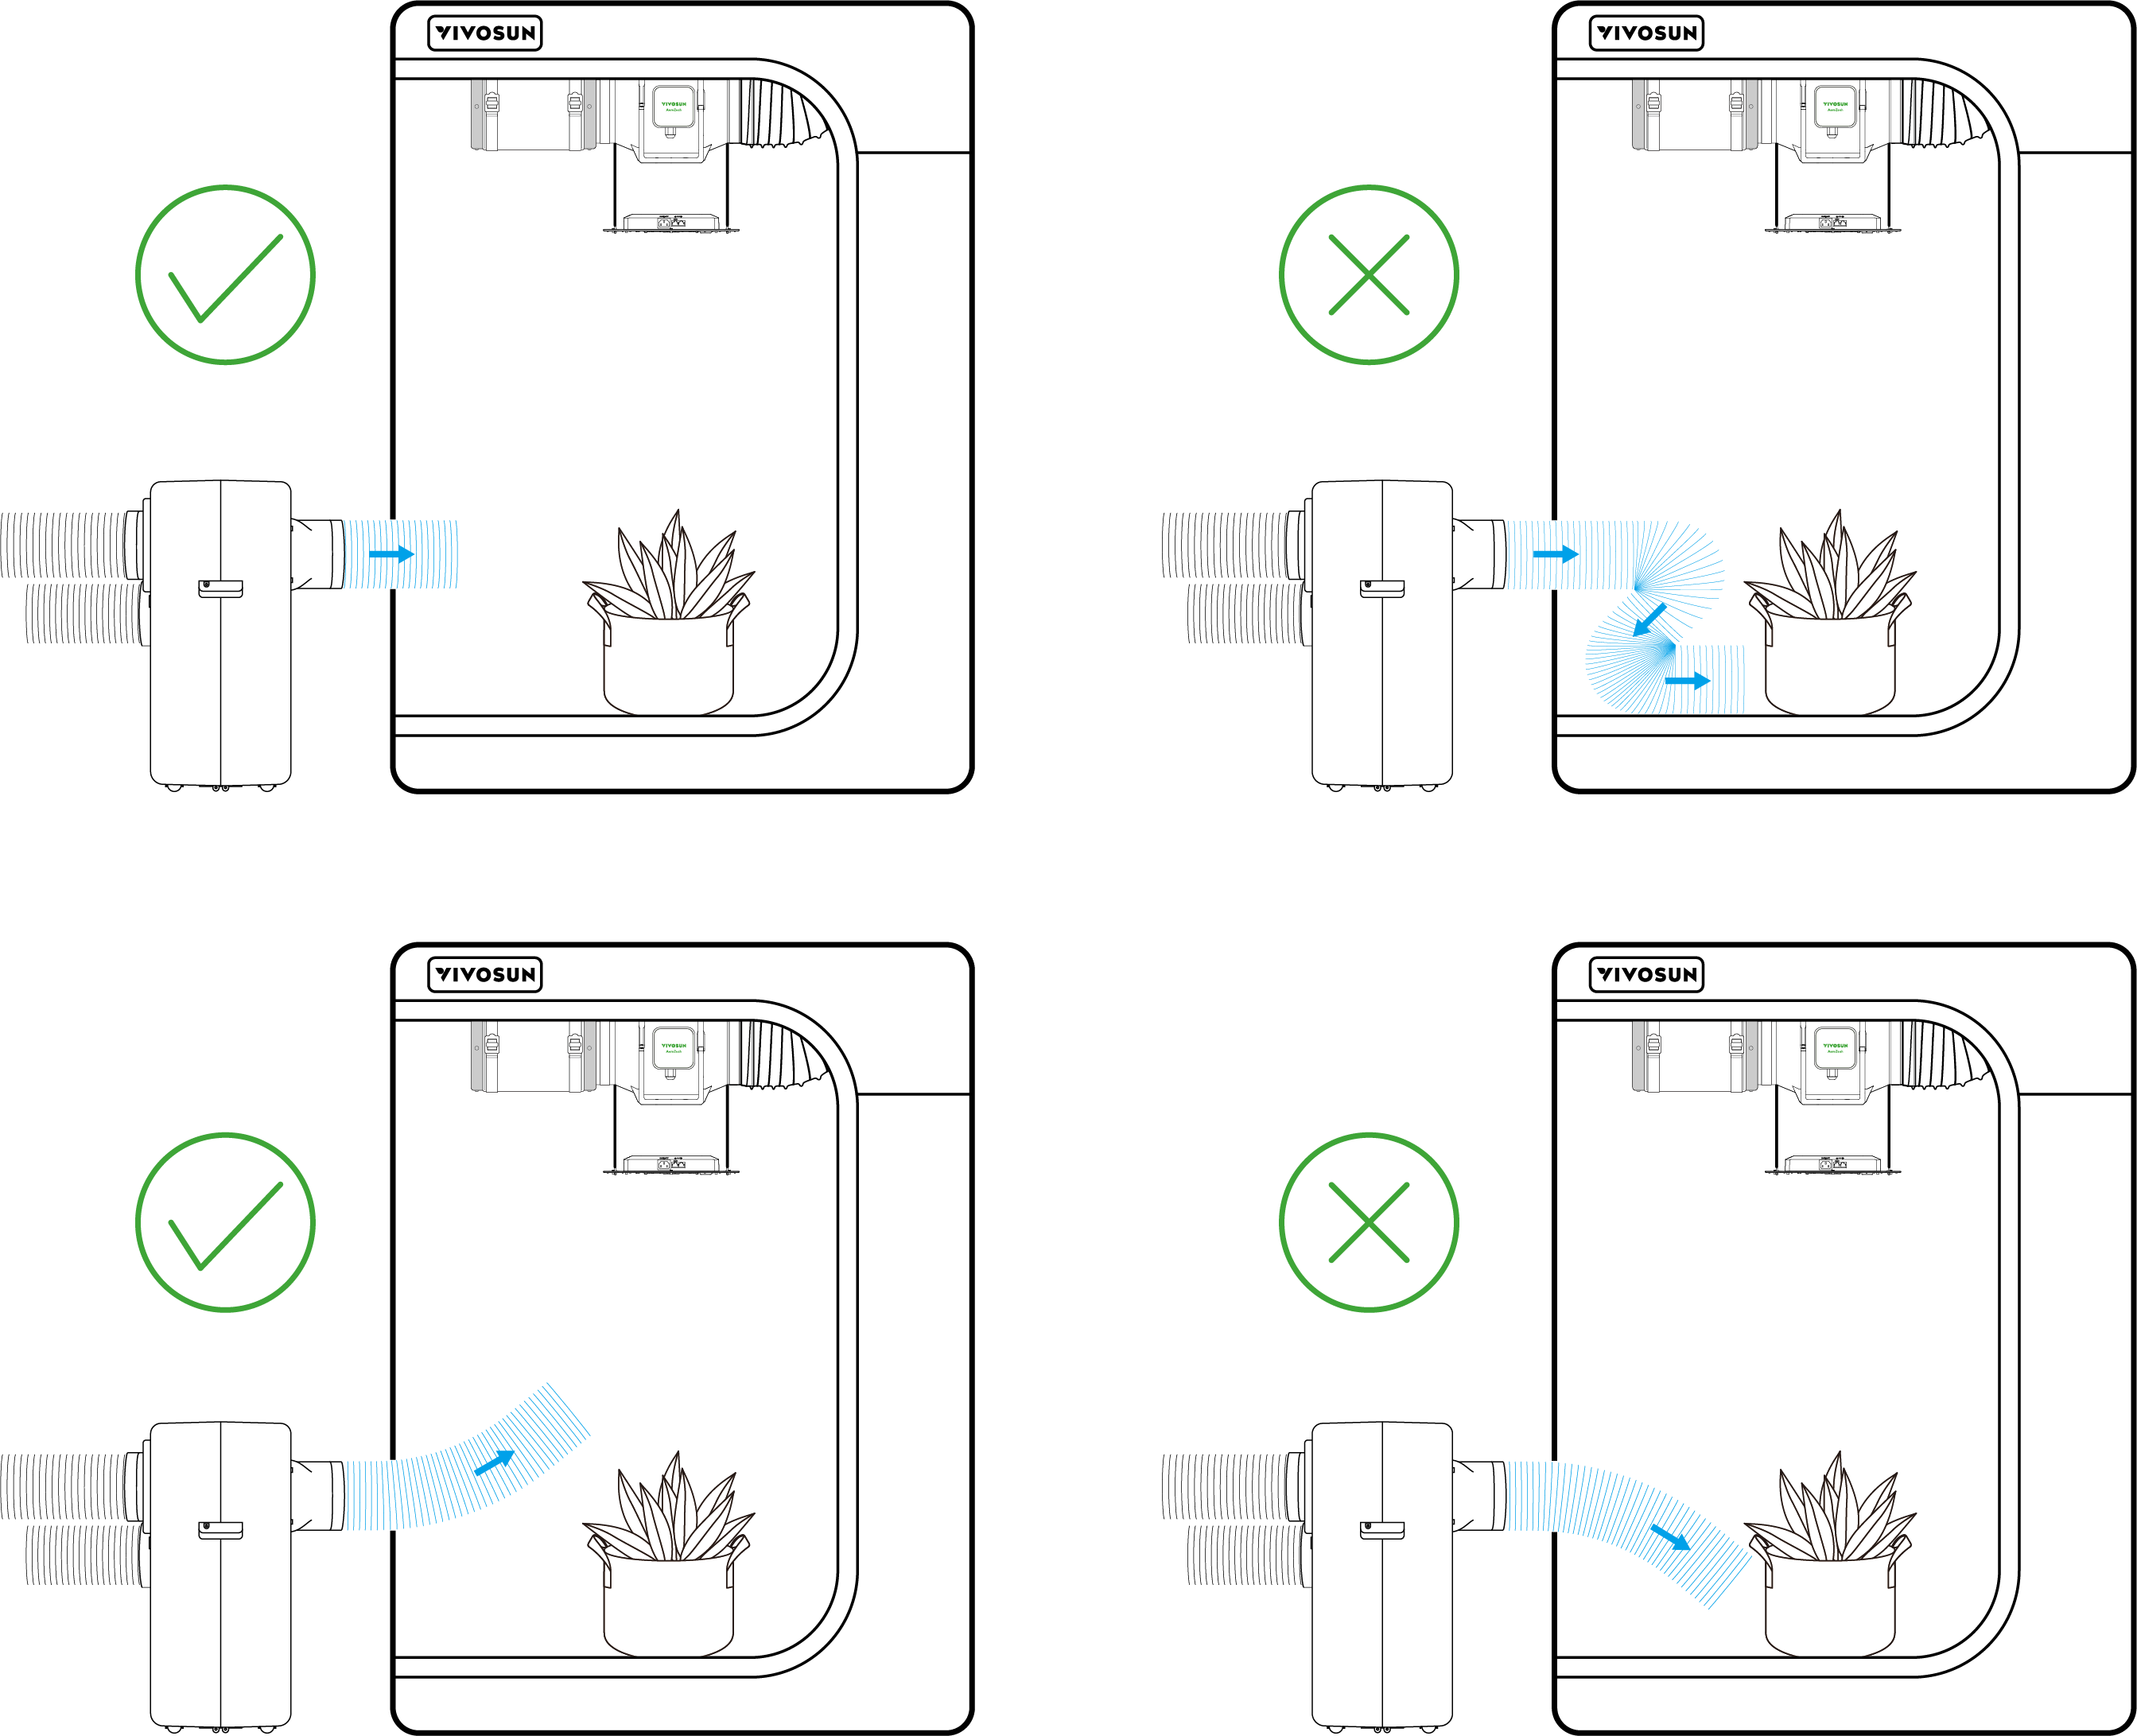
3.Temperature and humidity layering may occur inside the tent. If the plants are growing tall, consider adjusting the positions of the air outlet and intake pipes to optimize conditions for the canopy.
|
|
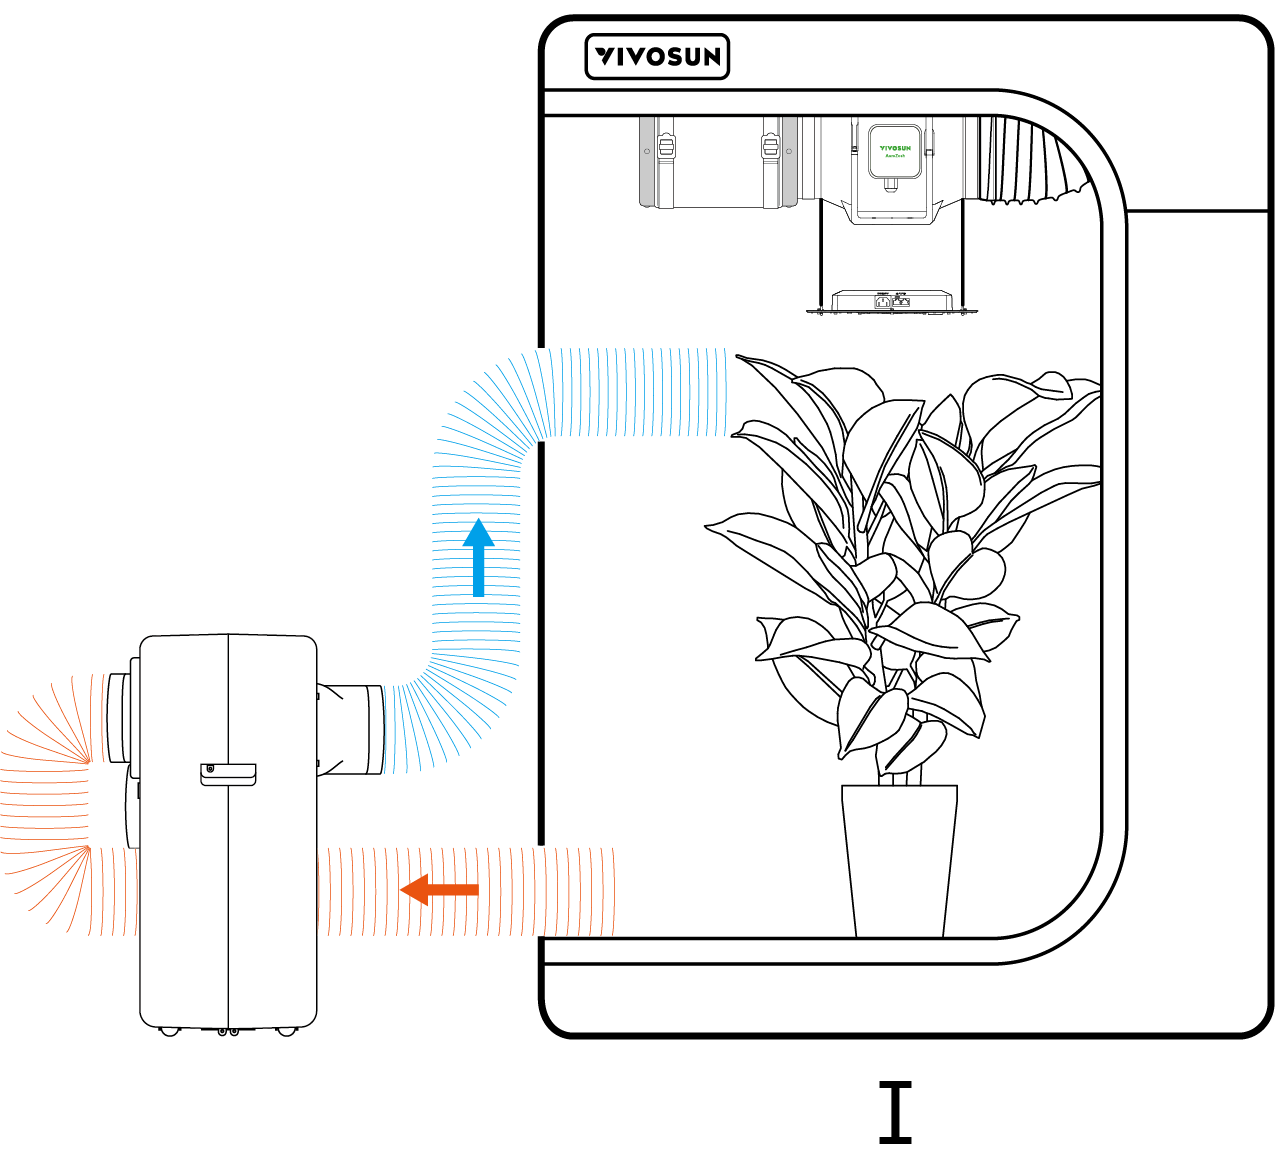
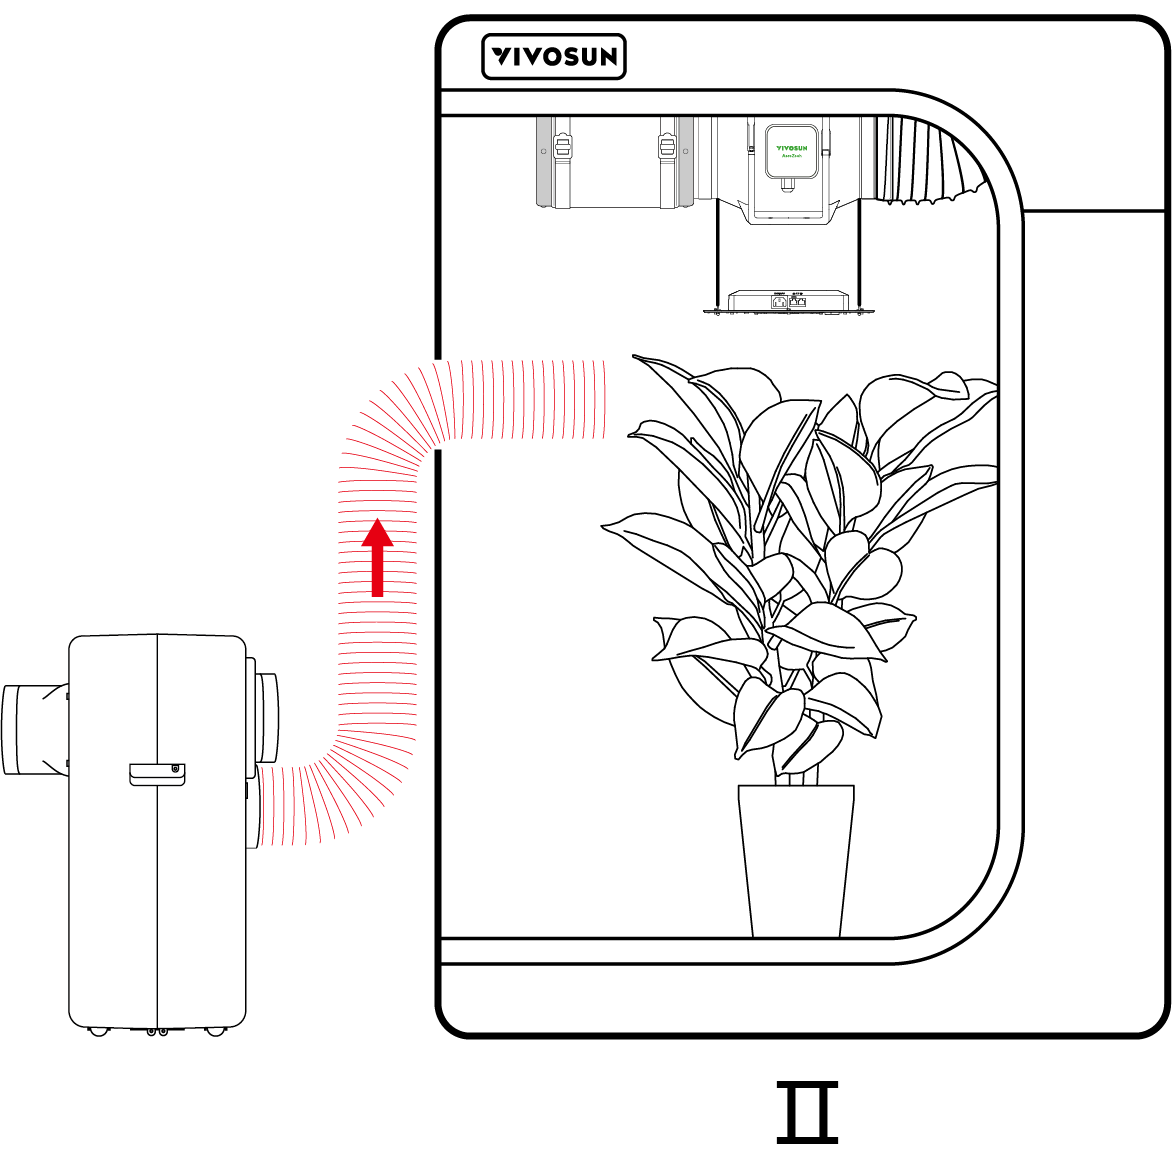
*Ⅰ  :Cool Mode
 Ⅱ  :Heat Mode
4.If indoor humidity is too high, condensation may form on the evaporator exhaust duct, causing water droplets. Wrapping the exhaust pipe with insulation material can help reduce condensation.
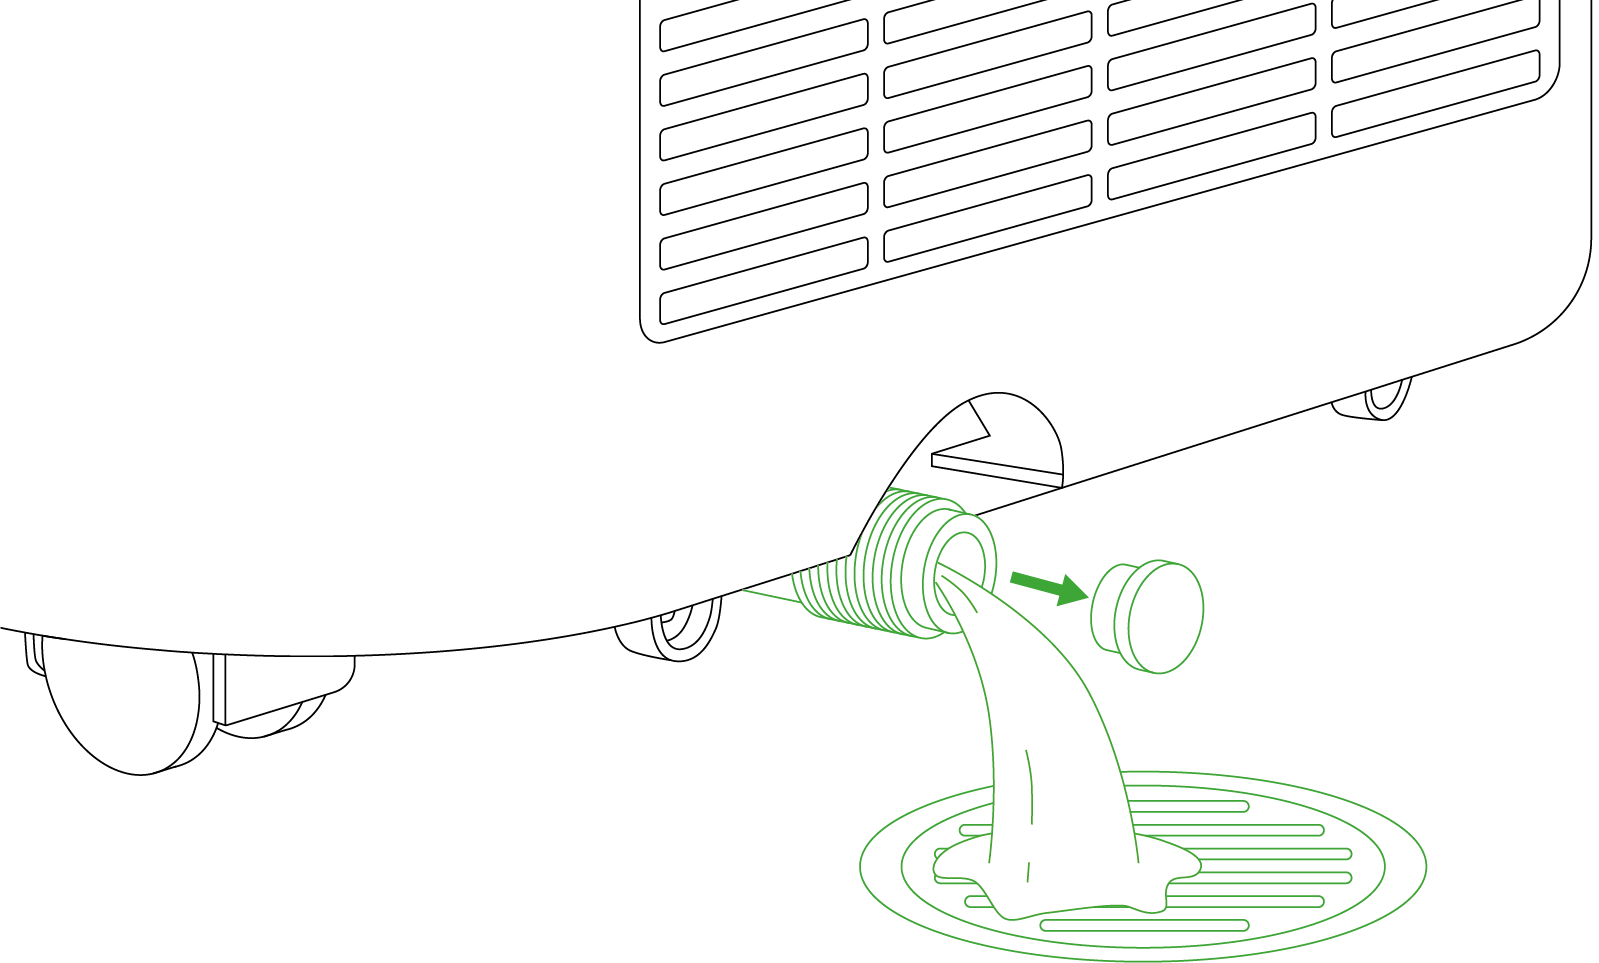
Installation of Drainage Pipe
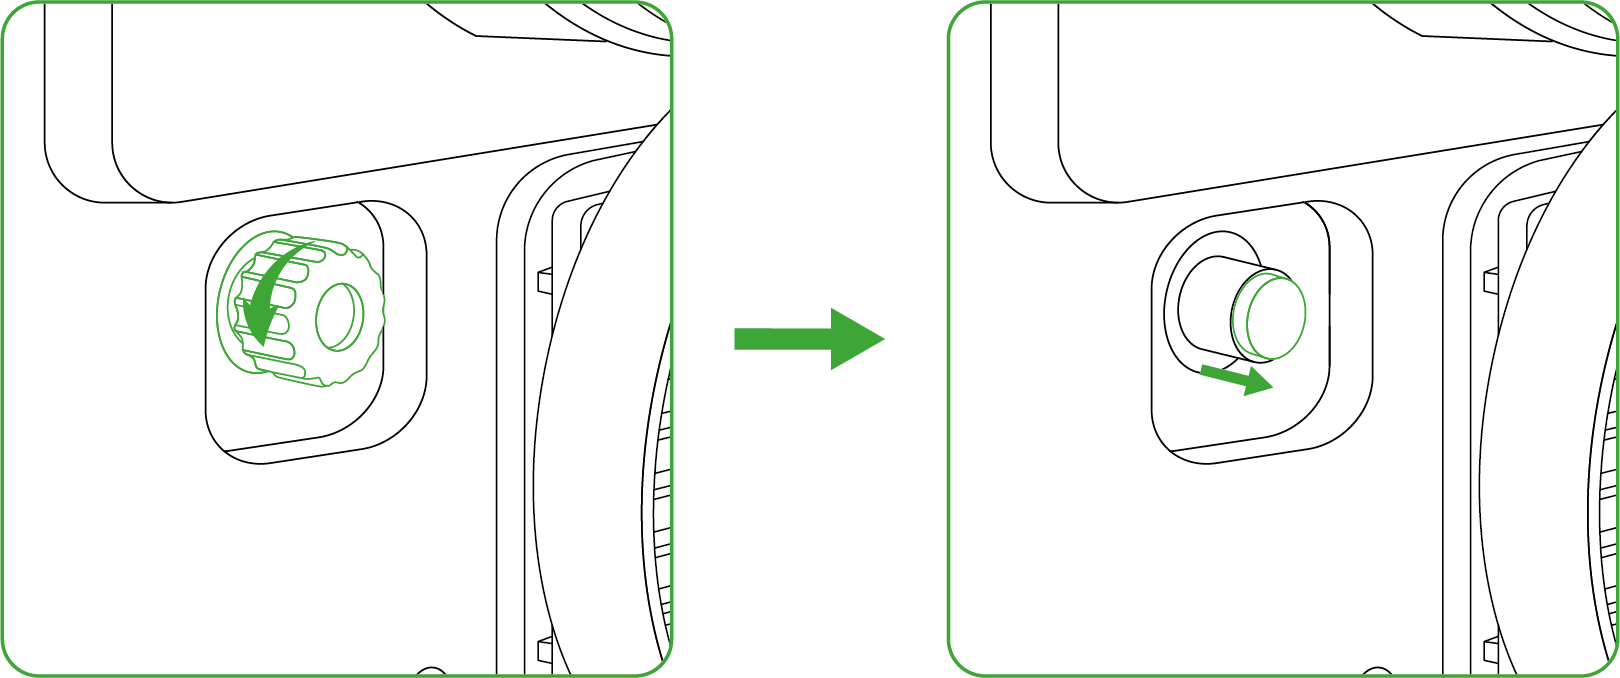
Step 1
Unscrew the nut on the drainage hole counterclockwise, then remove the soft plug inside.
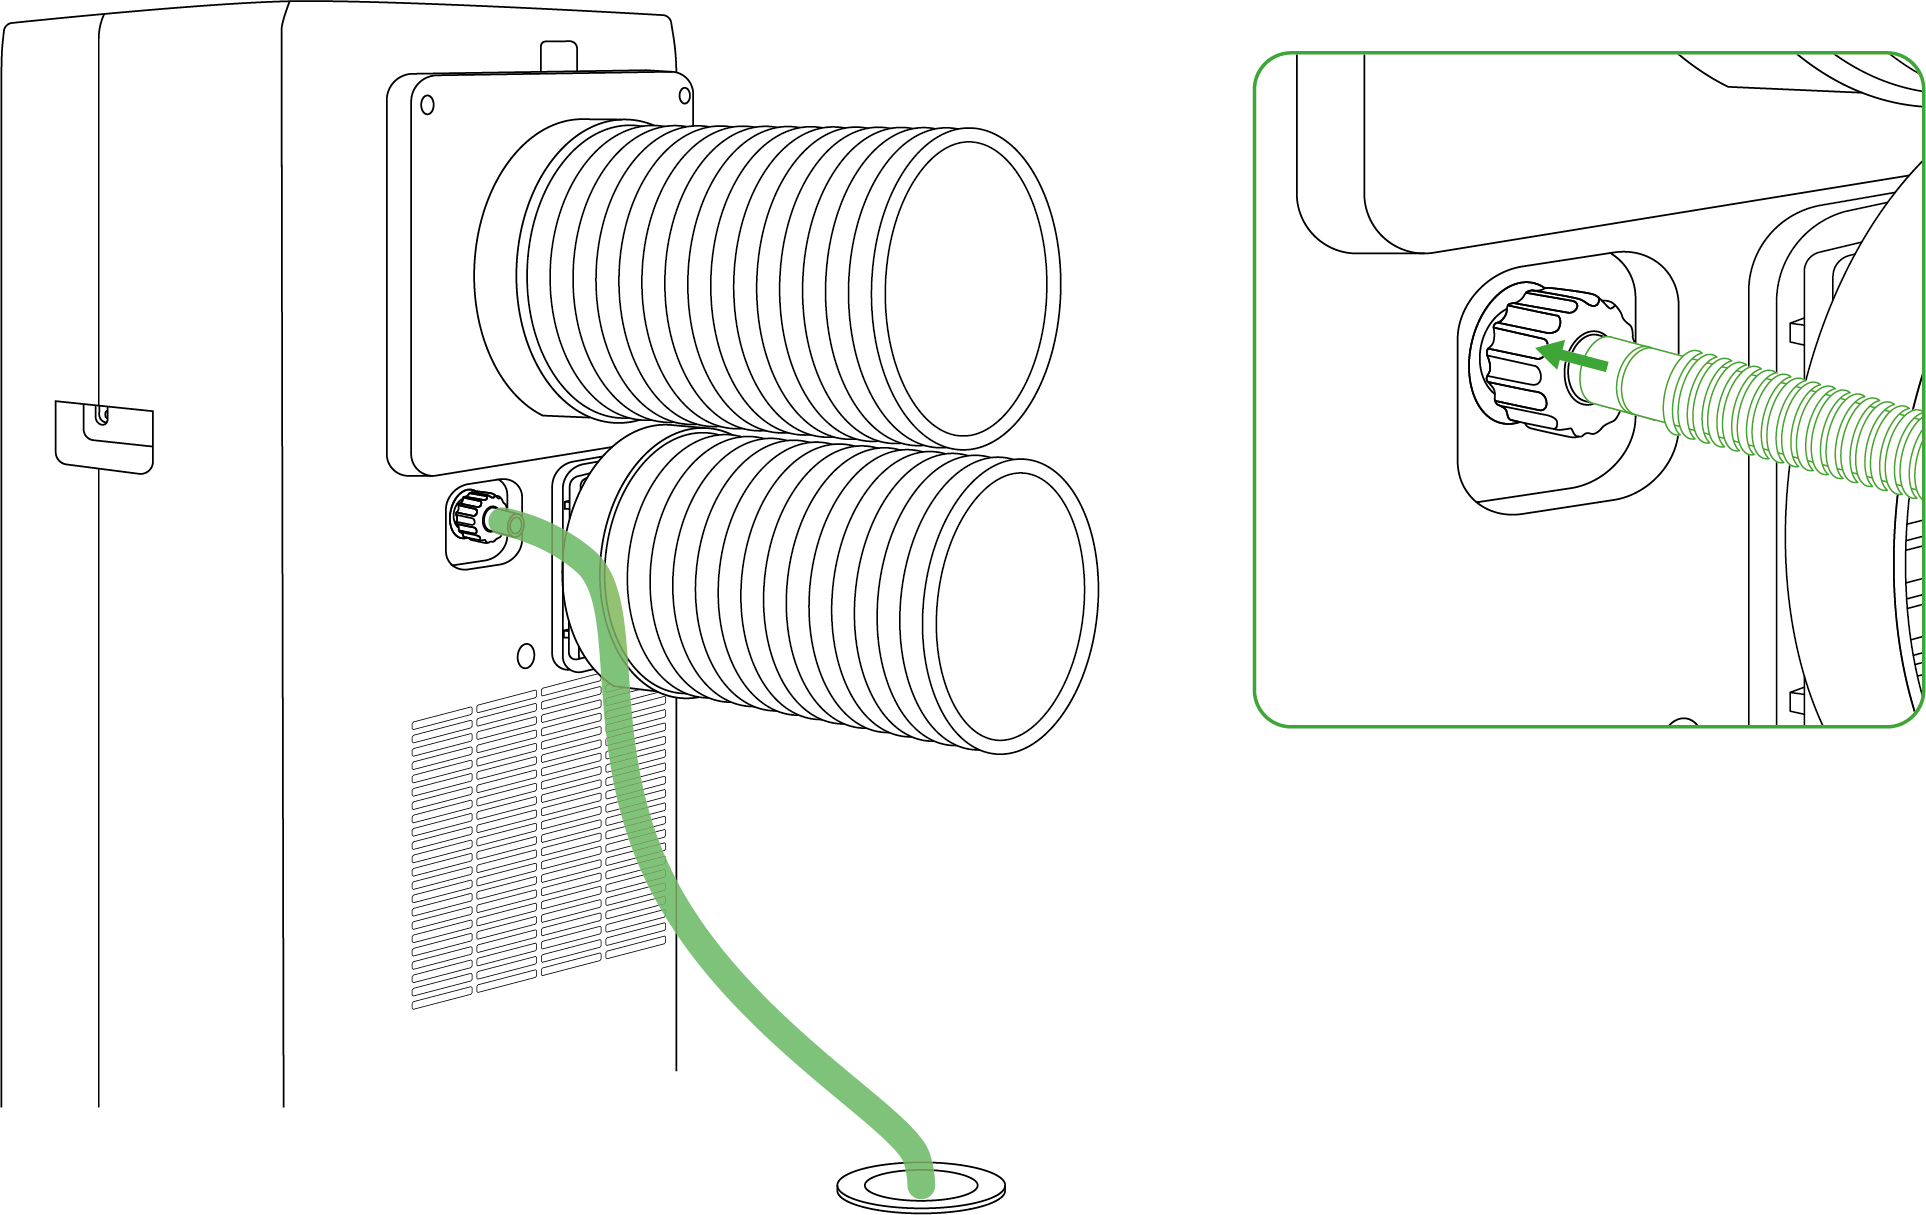
Step 2
Remove the drainage connector from the water pipe and insert it into the nut, then screw the nut back onto the drainage hole clockwise.

Step 3
Attach the drainage pipe to the drainage connector and place the other end in the sewer or drainage tray.
Note:
-
The drainage pipe must be connected in Dry Mode; for other modes, it is optional.
-
If the screen displays a “water full” icon, unscrew the spare drainage hole to drain the water.
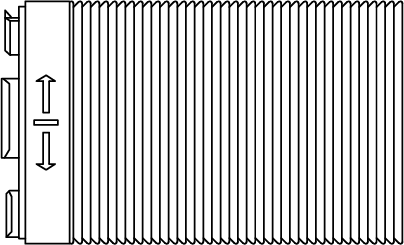
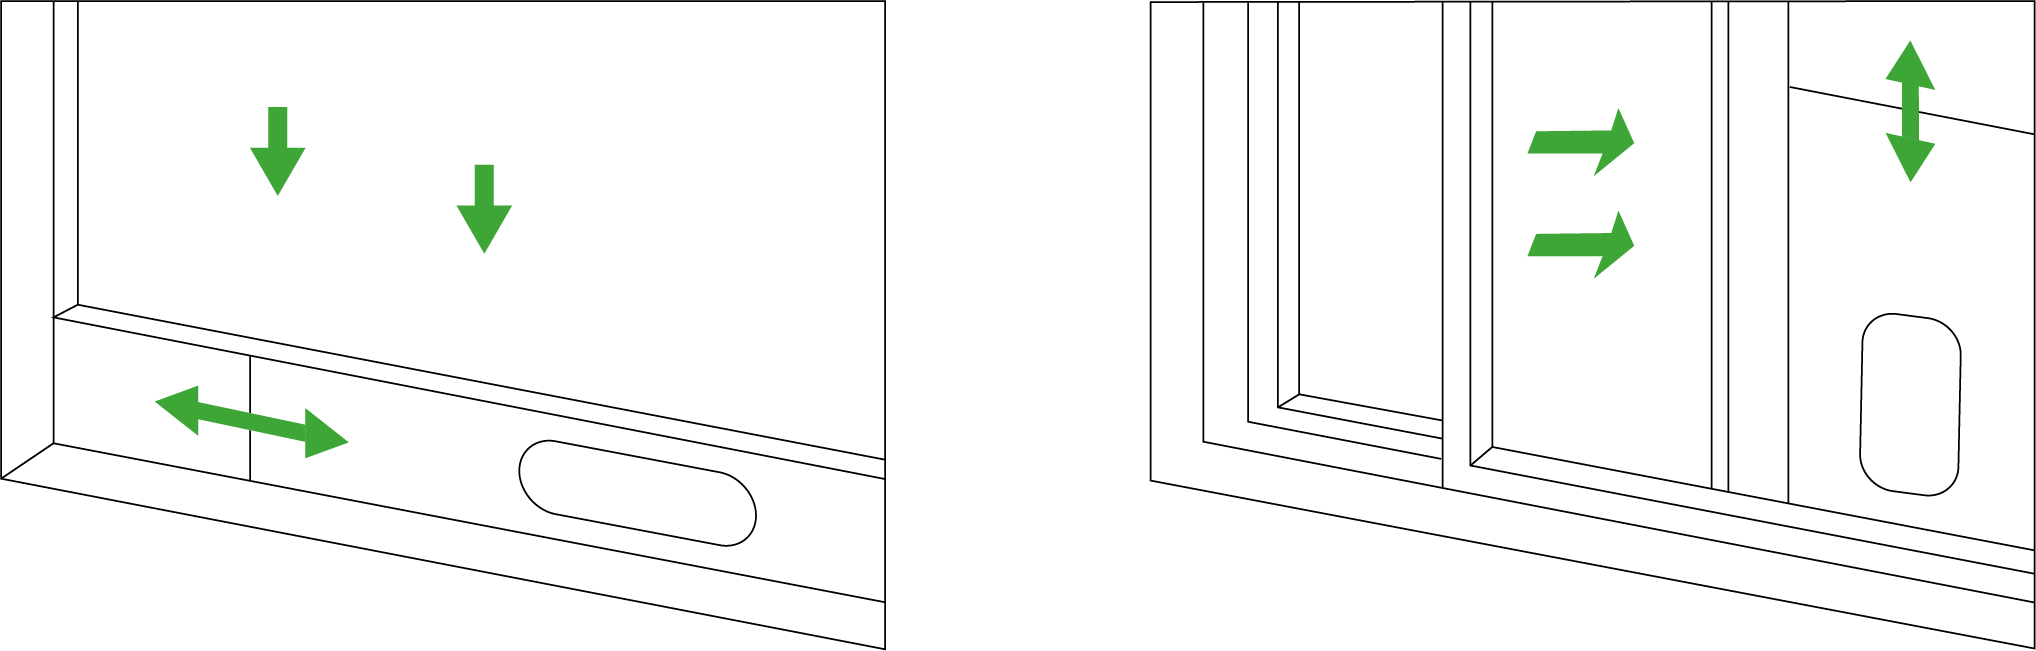
Installation of Window
Step 1
Install the Window Duct Adapter clockwise onto the other end of the condenser exhaust pipe.
Step 2.1
Partially open the window and mount the window sealing plate assembly onto the window. The components can be placed either horizontally or vertically.
Step 2.2
Extend the various components of the window sealing plate assembly, adjusting their distance to ensure both ends of the assembly make contact with the window frame. Then, secure all components in place.
Note:
-
Select the appropriate window sealing plate (long or short) based on your window size.
-
The flat end of the exhaust pipe joints must be securely snapped into place.
-
The pipe should not be distorted or have substantial bends (greater than 45°). Ensure that the exhaust pipe remains unobstructed for proper ventilation.
Control Panel

|
On/Off Button |
Press to turn on. Press and hold for 3 s to turn off. |
|
Mode Button |
Press to switch function modes:Cool, Heat, Dry, Fan. Press and hold to exit Recipe Mode (Effective only when recipe is running). |
|
Fan Speed Button |
Press to switch fan modes: standard mode and quiet mode. |
|
Up Button |
Press to increase value of current setting. Press and hold to switch between °C and °F |
|
Down Button |
Press to decrease value of current setting. |
|
Confirm Button |
Press to confirm current operation. Press and hold to enter the settings menu, including calibration, and mute toggle. |


Other Button Operations:
-
Press and hold the On/Off and Up buttons to lock or unlock the device.
-
Press and hold the On/Off and Confirm buttons to reset the device to factory settings.
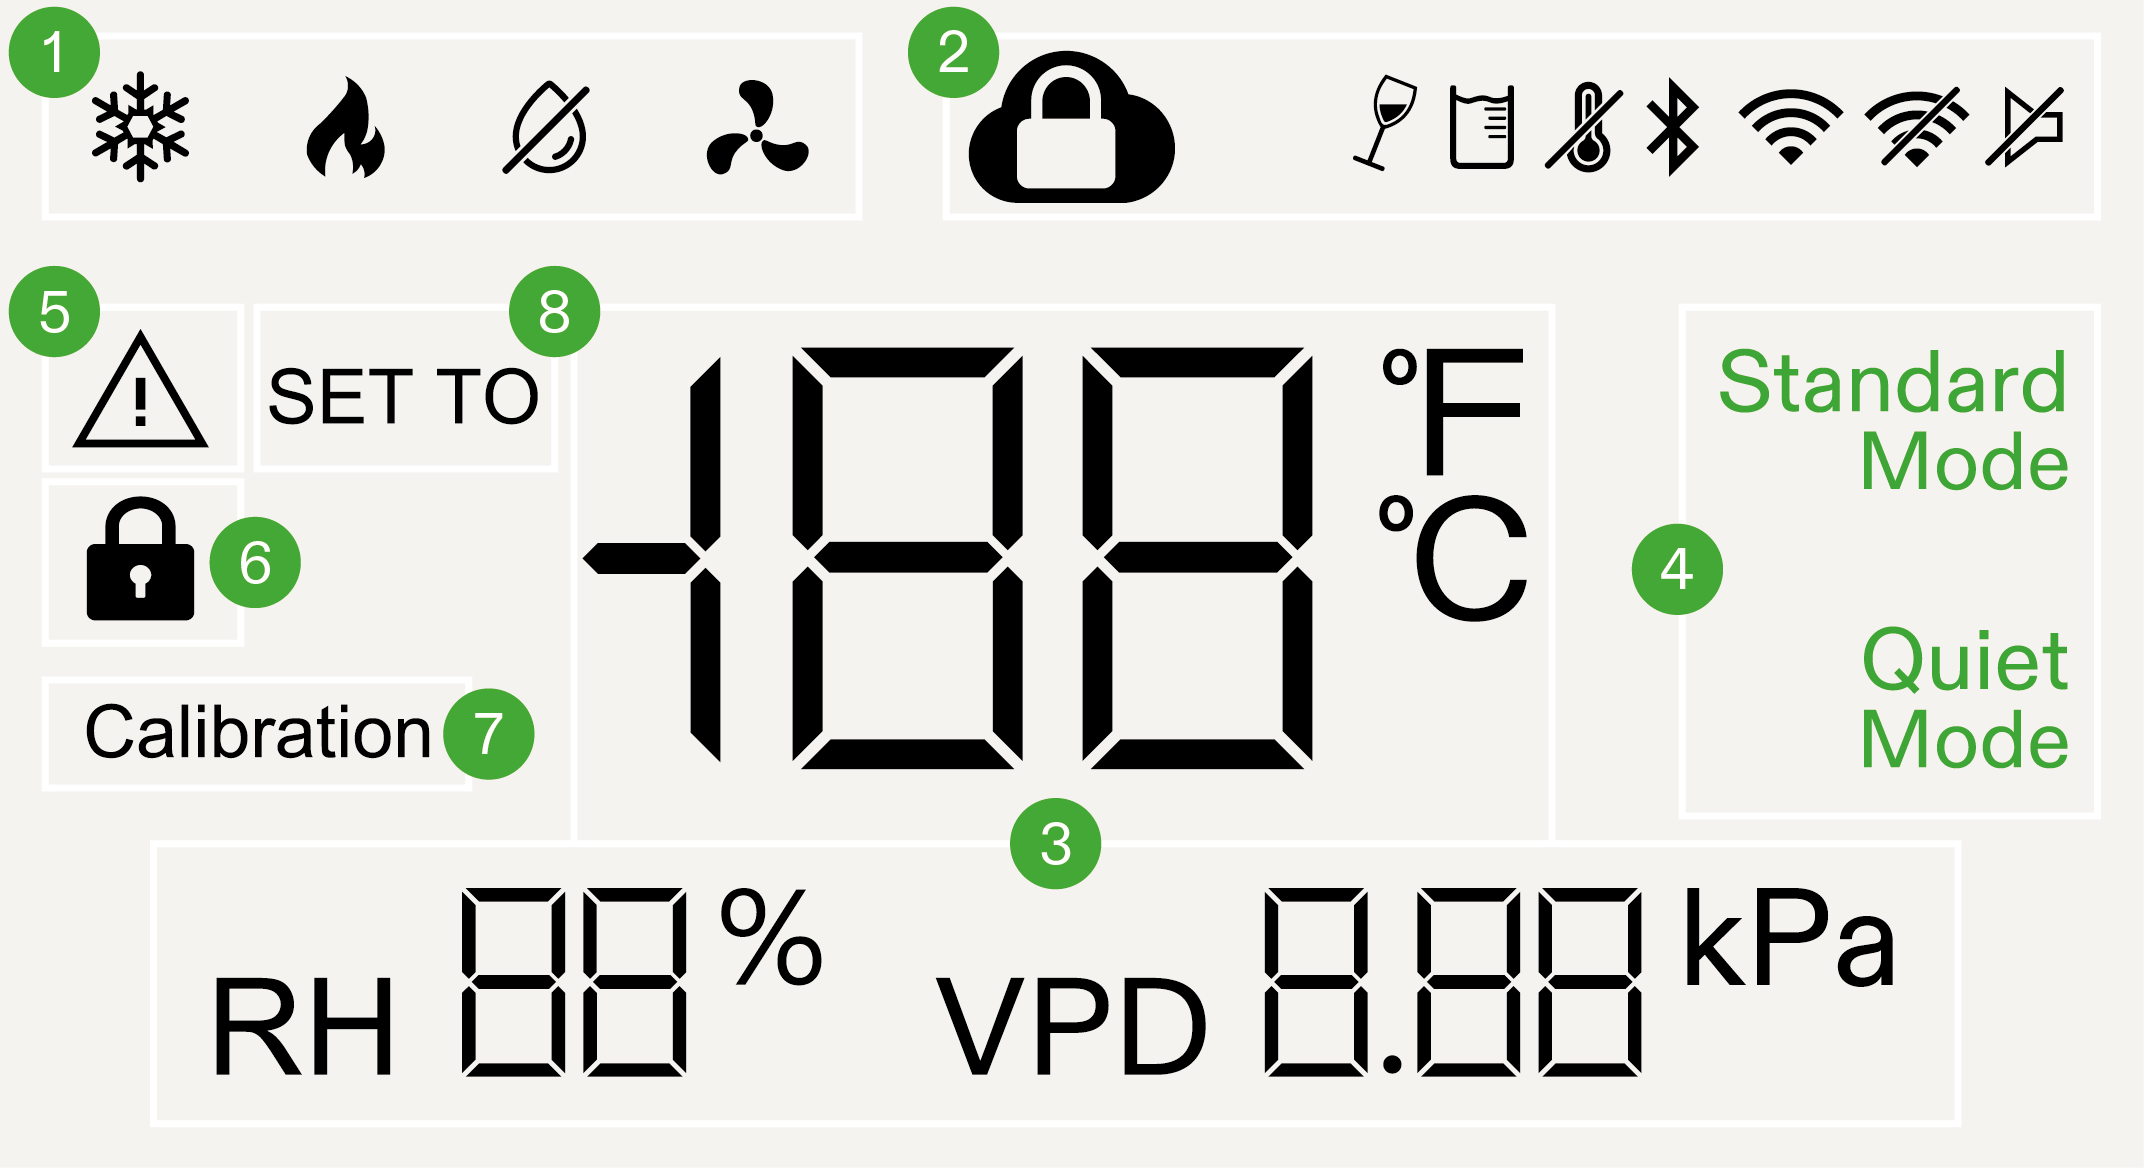
|
Function Mode |
Cool, Heat, Dry, Fan. |
|
Status Icon |
Indicates device status, including cloud lock, tilt, water full, probe detection, connection status, and mute. |
|
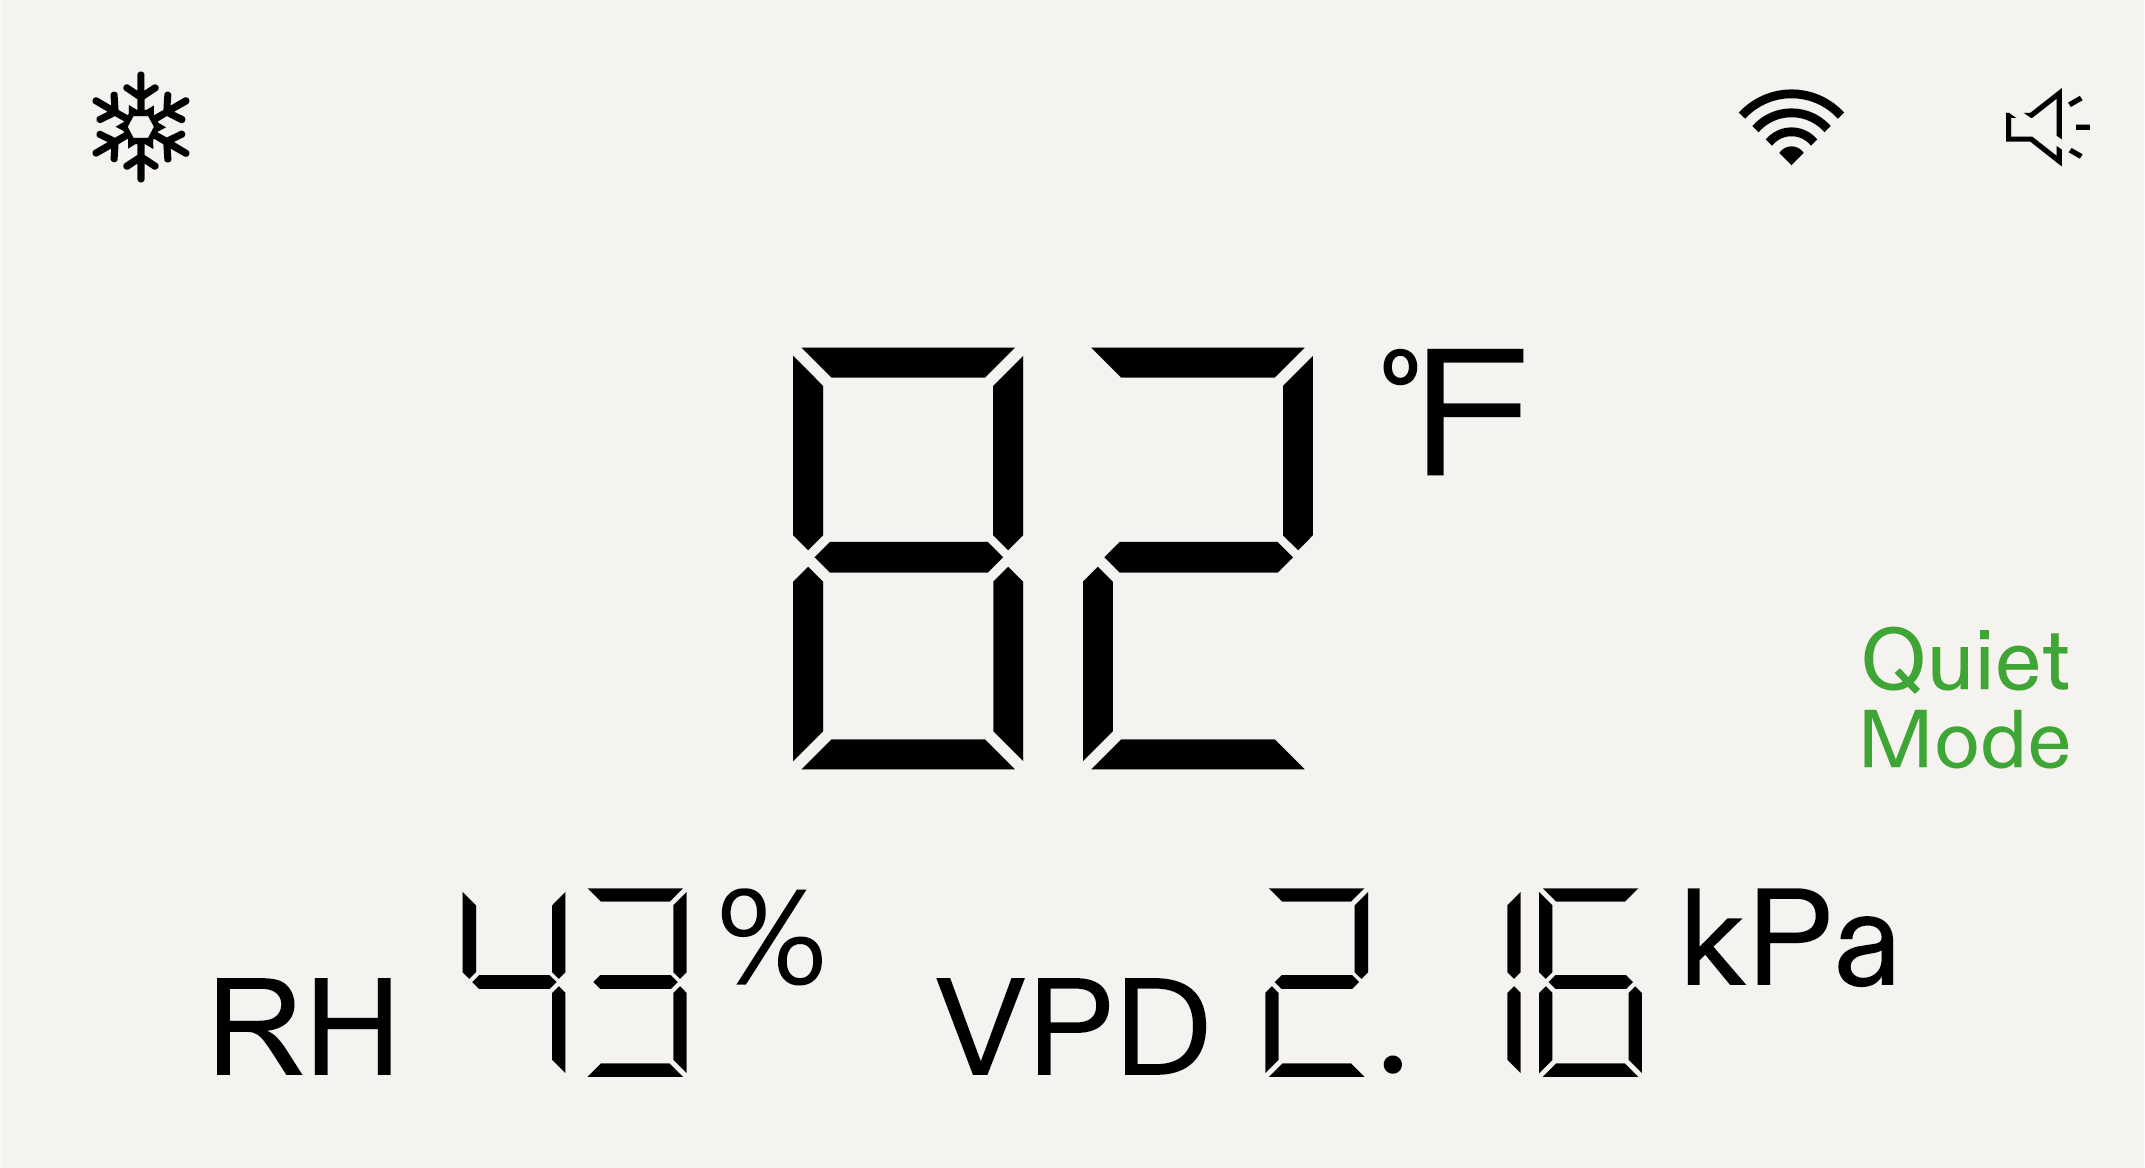
Probe Readings |
Displays current probe readings, including temperature, relative humidity, and VPD. |
|
Fan Speed |
Standard Mode and Quiet Mode. |
|
Error Icon |
Displays an error code when the device encounters an issue. |
|
Screen lock Icon |
Illuminates when screen operation is locked. |
|
Calibration Mode |
Icon appears when performing temperature and humidity calibration. |
|
Setting Mode |
Icon appears when adjusting temperature and humidity settings. |


Operation
Press the Mode Button to enter mode selection, then press it again to cycle through available modes. Select Cool Mode and press the Confirm Button to confirm. Use the Up/Down Button to set the target temperature, then press the Confirm Button again to start the device.
Note:
-
After switching modes, ensure that the duct installation is correct.
-
In Fan Mode, temperature and humidity settings are not required.
-
The air conditioner uses a smart buffer to stay within ±1.8°F of your set temperature and ±5% of your target humidity.
Wi-Fi Configuration
Step 1
Download the Vivosun app
Search “VIVOSUN” in the Apple App Store or in the Google Play Store to download the Vivosun app.

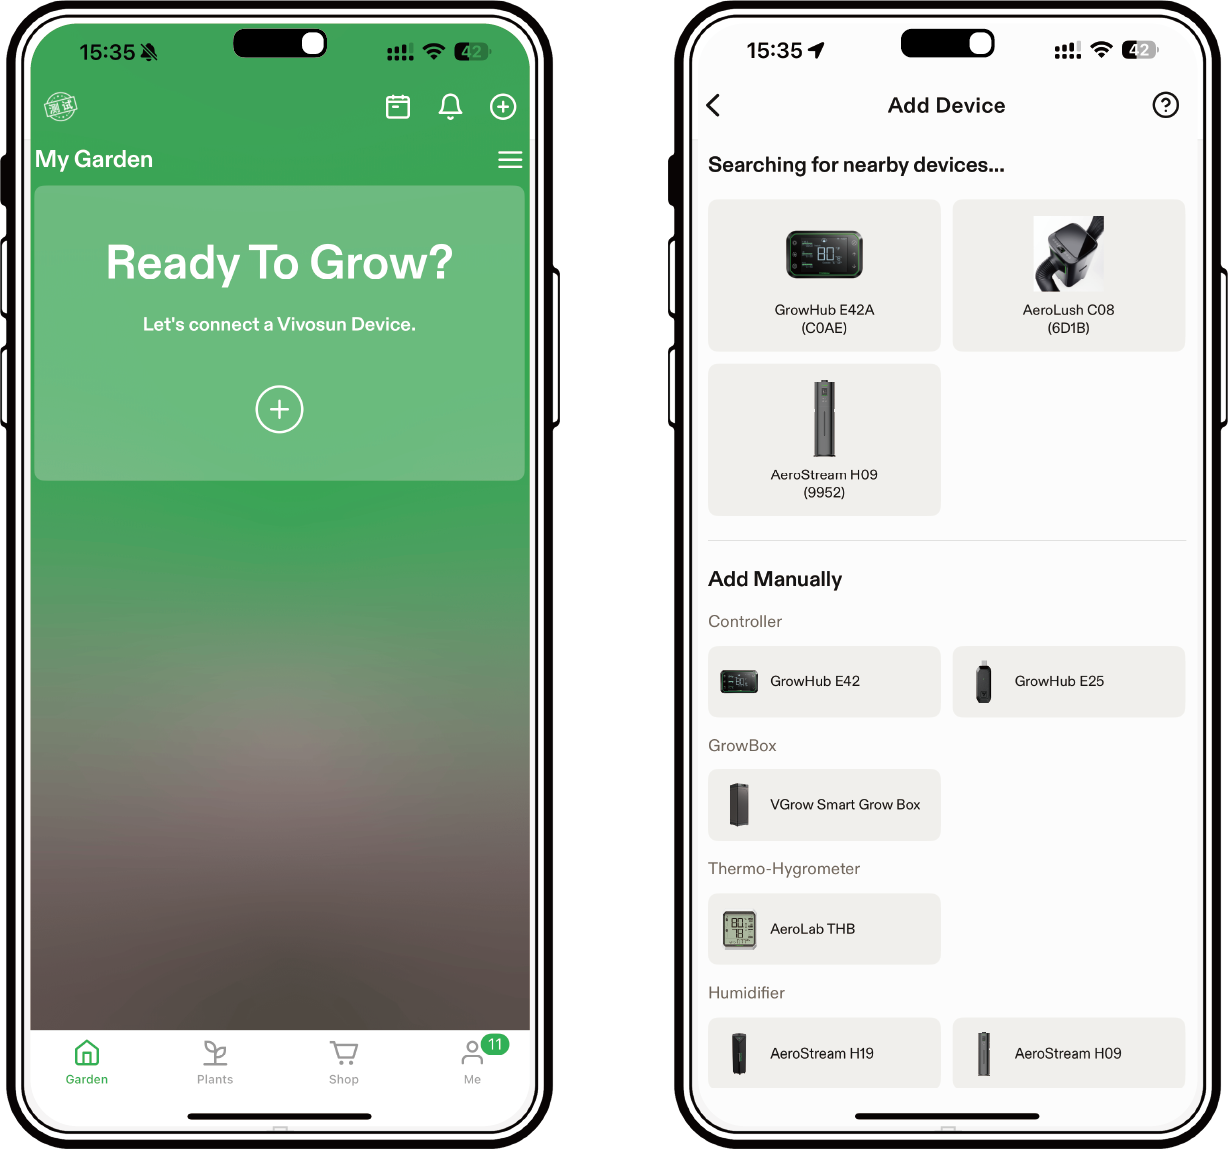
Step 2
Add AeroLush
Tap “+” to add AeroLush, then follow the prompts in the app to complete the Wi-Fi configuration.
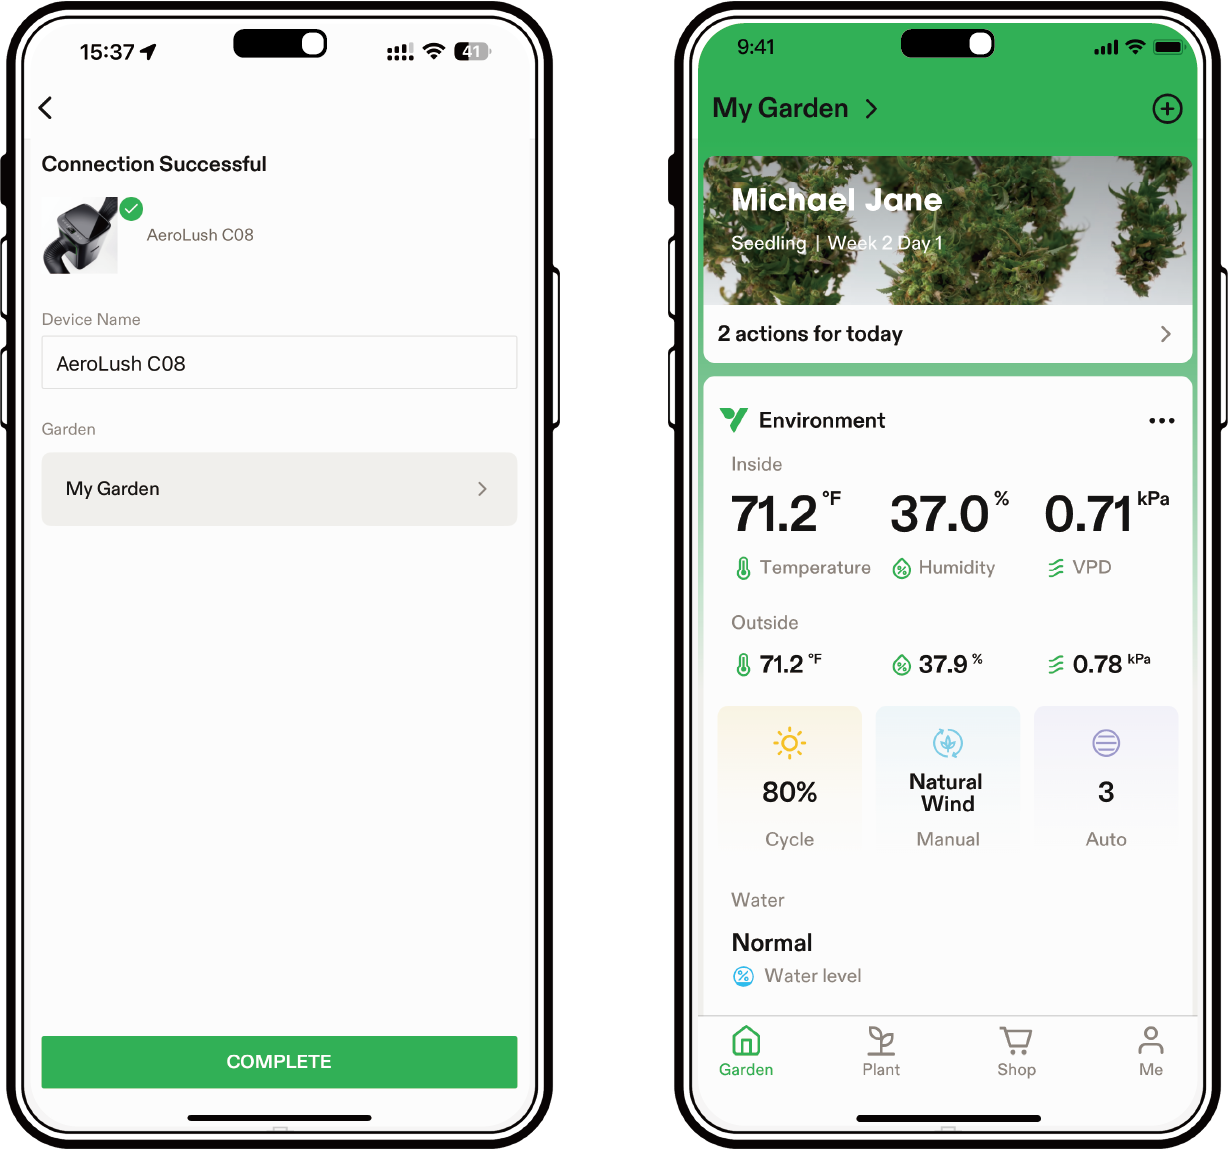
Step 3
Name Device
After a successful connection, you can rename your device.
Maintenance
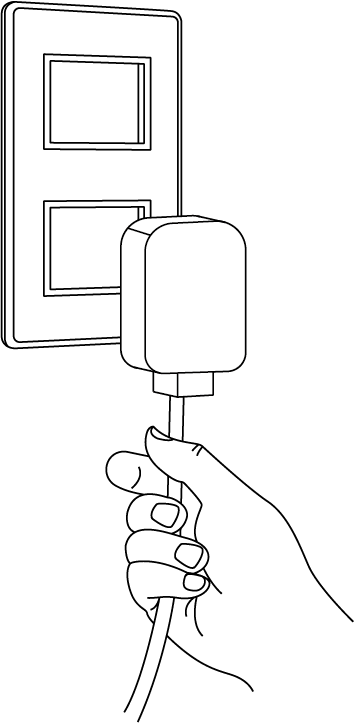
Before performing maintenance, make sure to turn off the power and unplug the device.
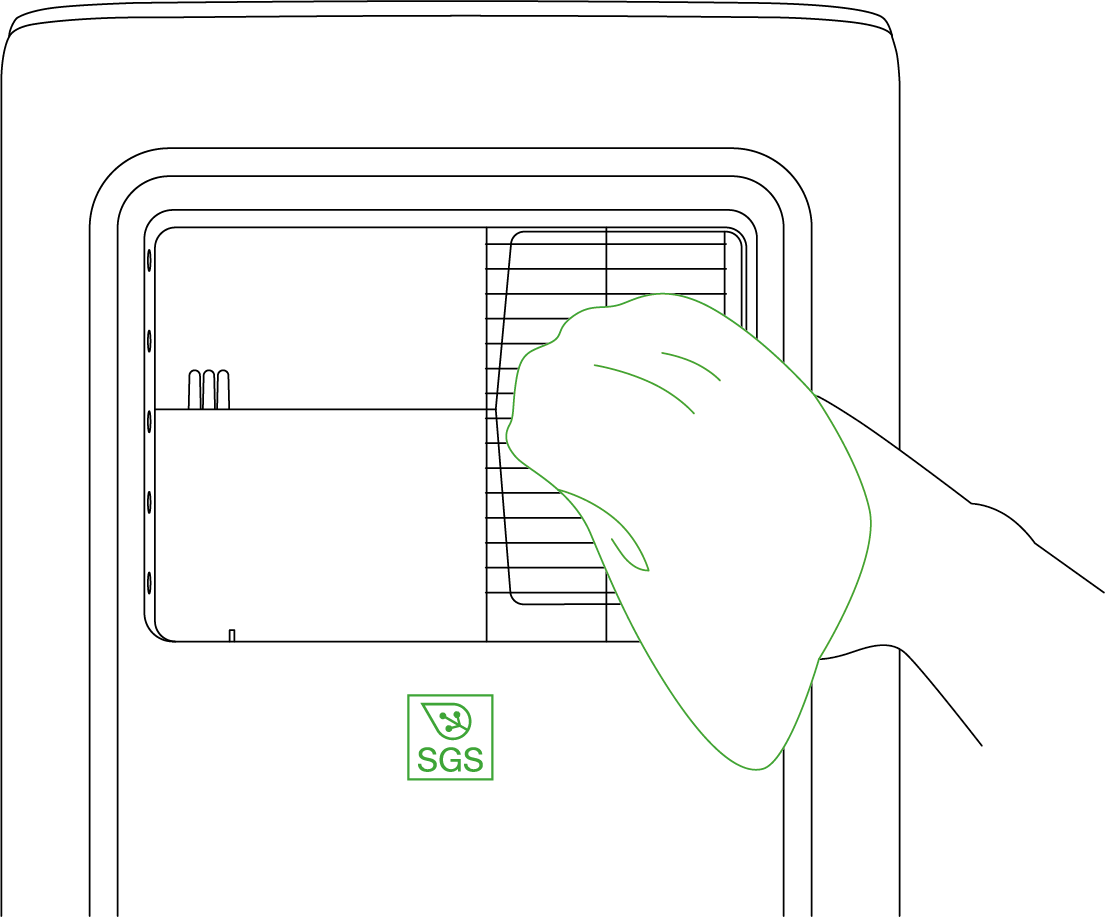
Surface Clean
Wipe the surface with a soft cloth. Do not use aggressive chemicals or detergents to clean the surface, as they may cause damage.
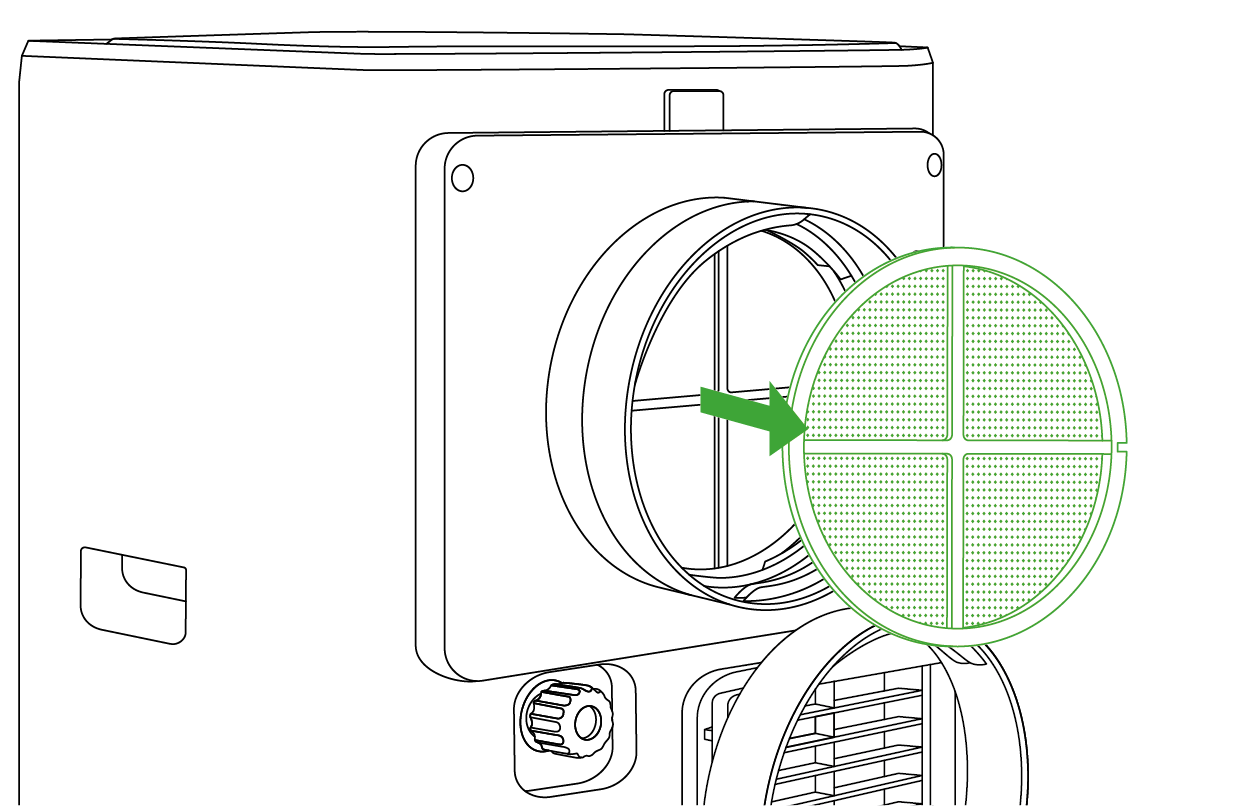
Filter Clean
Take the filter out of the air conditioner. Gently soak the filter in a mild detergent, rinse it thoroughly, and allow it to dry. Dirty filters reduce airflow, so they should be cleaned every two weeks.
Troubleshooting
Problems |
Reasons |
Solutions |
The air conditioner does not work. |
There is no electricity. |
Turn it on after connecting it to a powered socket. |
The ambient temperature is too low or too high. |
It is recommended to use the device at a temperature of 7-35°C (44-95°F). |
|
The environmental target value has been reached. |
Adjust the set temperature or humidity. |
|
The compressor must wait for 3 minutes after stopping before it can restart (system protection). |
Wait for 3 minutes and check if it works. |
|
The water tank is full in dry mode. |
Drain the condensed water and connect the drainage pipe. |
|
Temperature and humidity probe not detected. |
Reinsert or replace the temperature and humidity probe. |
|
The air conditioner tipped over. |
Lay the device flat and let sit for at least 24 hours before use. |
|
Product displays error code: DF: Defrosting in progress E01: Power board communication failure E02: NTC sensor short circuit E04: NTC sensor open circuit |
Wait for 5 minutes to see if the issue resolves. If not, please contact our customer service for assistance. |
|
Cooling capacity is not sufficient. |
The air inlet and outlet are blocked. |
Clear the blockage. |
The exhaust duct is severely bent. |
Ensure that the duct bend does not exceed 45°. |
|
The filter is too dirty. |
Clean or replace the filter. |
|
The fan speed is too low. |
Switch to standard mode. |
|
Noise or vibration. |
The air conditioner is not placed on a flat surface. |
Put the air conditioner on a hard, flat surface. |
Warranty
VIVOSUN offers a 2-year limited warranty on this product purchased directly from us or our authorized dealers, beginning on the original date of purchase.
This warranty is provided in addition to, and does not affect, your statutory rights under applicable consumer protection laws in the country where the product was purchased.
For the full Warranty Policy, please visit: https://www.vivosun.com/help/warranty-policy
Alternatively, you may contact customer service at support@vivosun.com / +1 888-505-8486.
Contents

We help you grow your best green.

We provide the highest quality.

We relentlessly pursue the future.

We make growing more enjoyable.

We support every grower.
Sign up and get 10% off your first order
©2026 Vivosun All Rights Reserved